
sales06@switek.biz

+86 186 5927 5869

Shopping

Subscrib to Us
sales06@switek.biz
+86 186 5927 5869
Shopping
Subscrib to Us
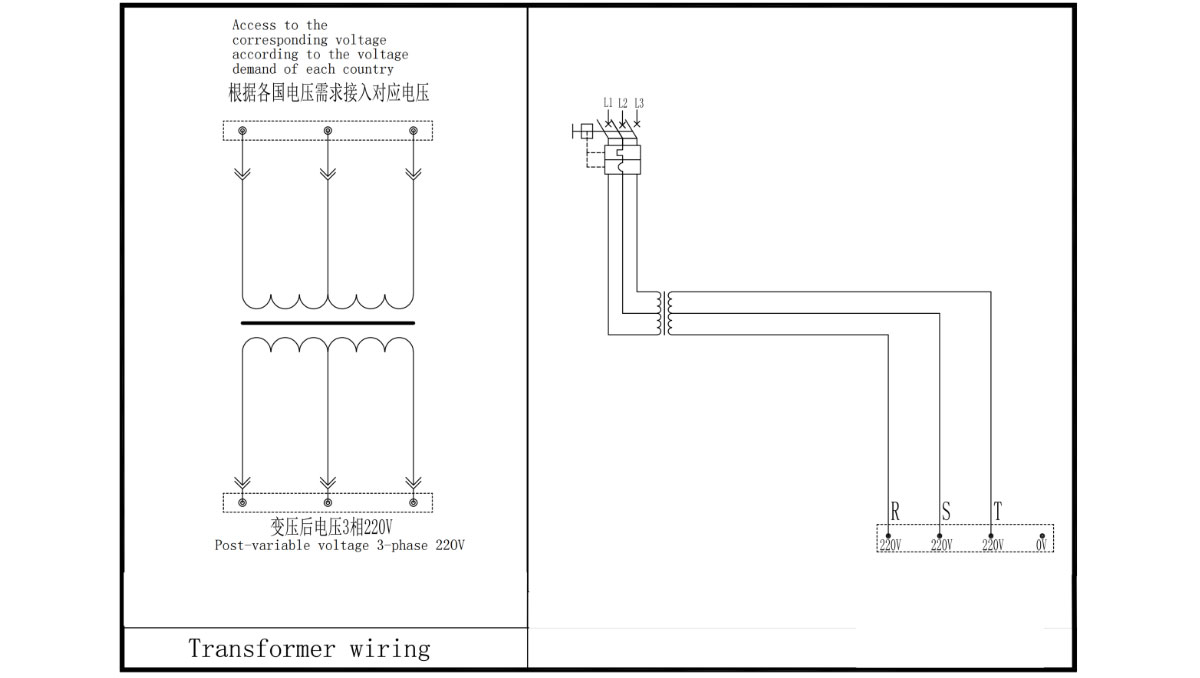
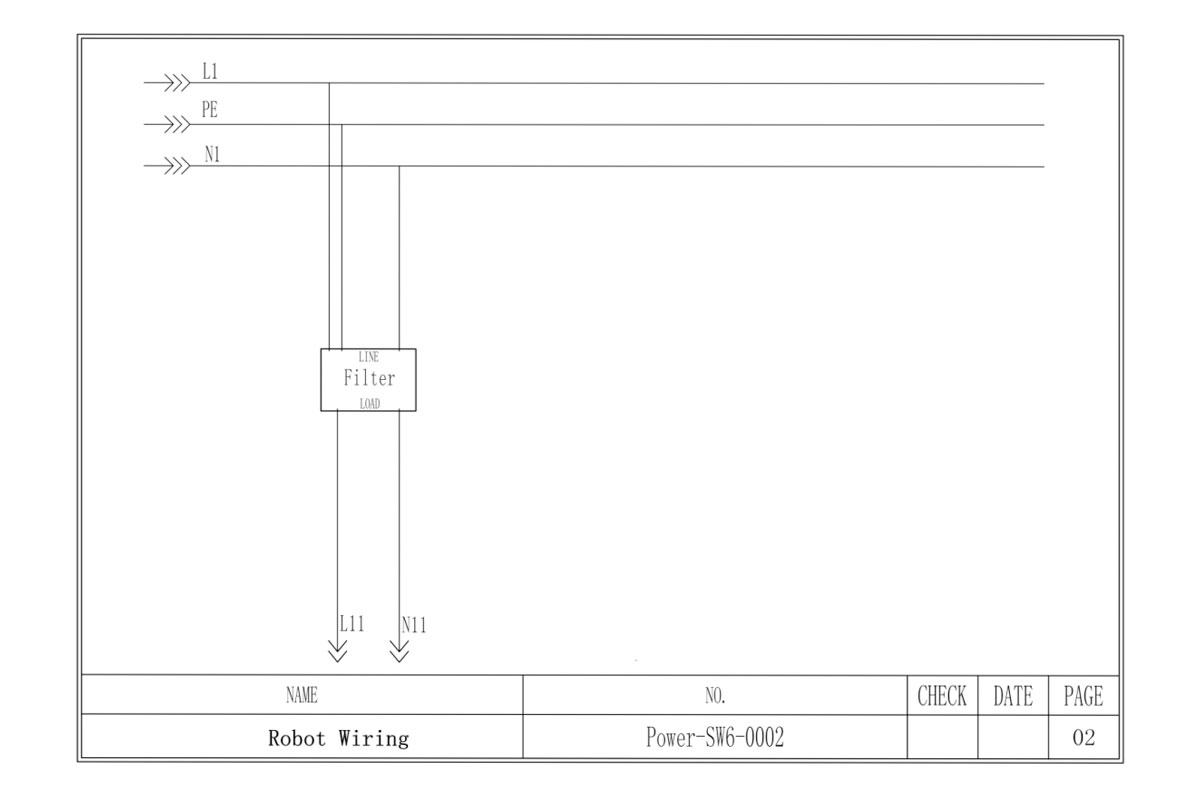
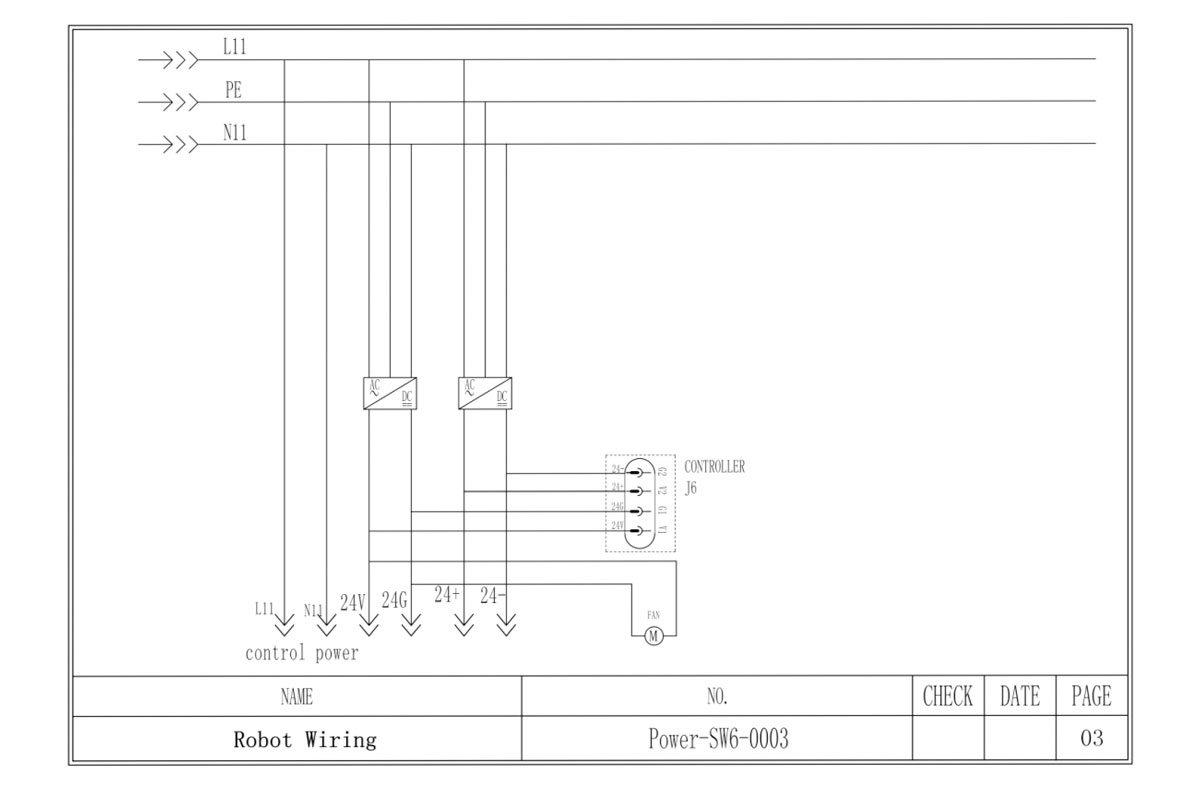
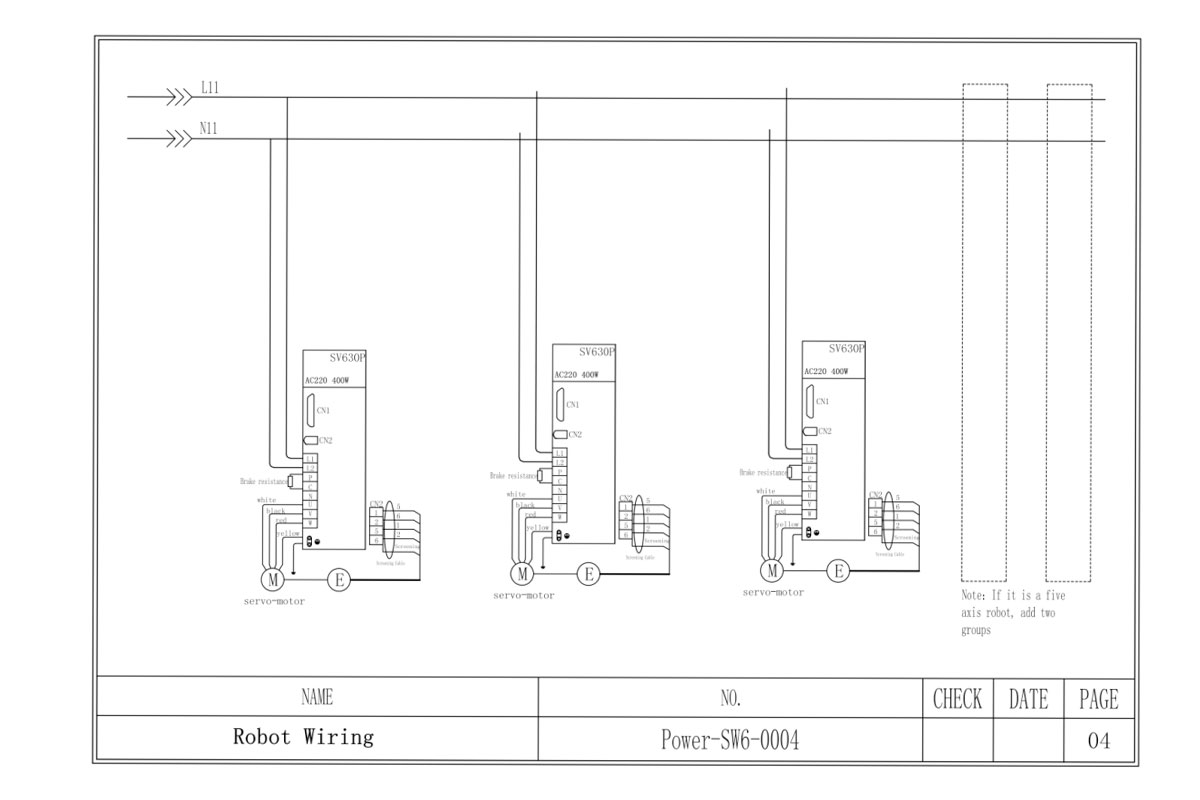
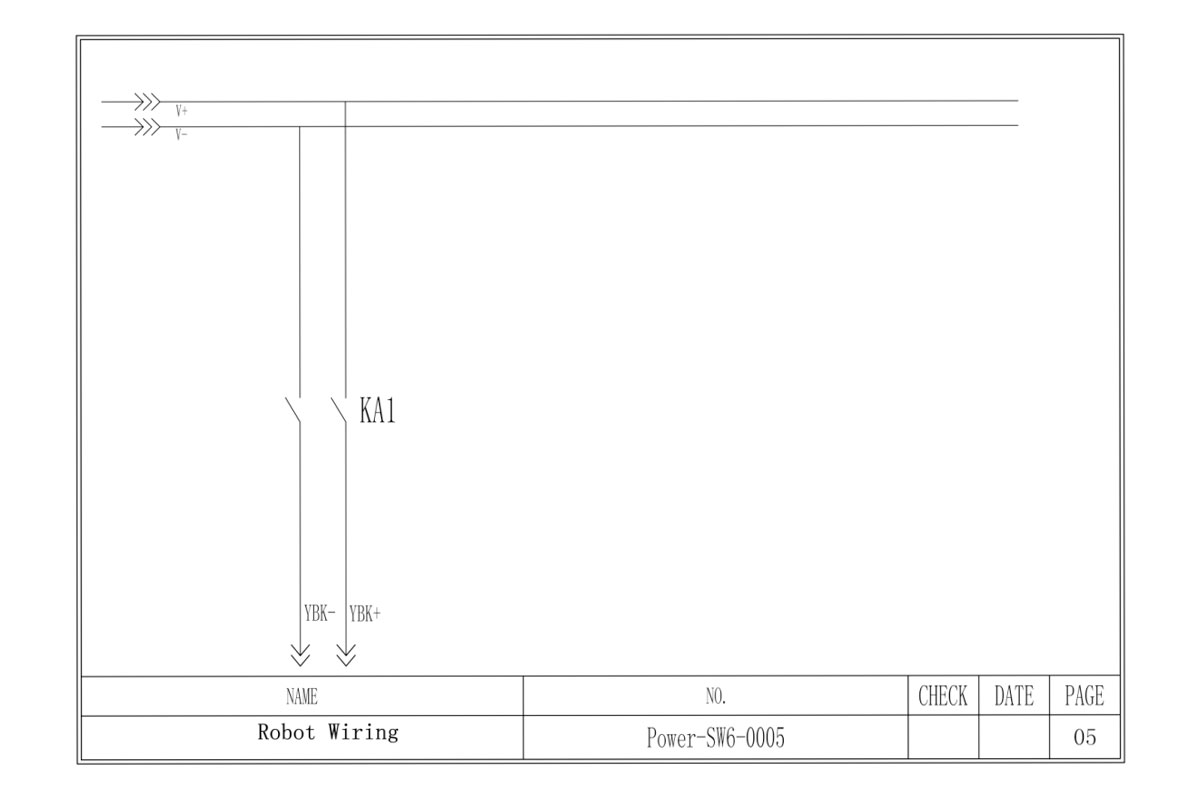
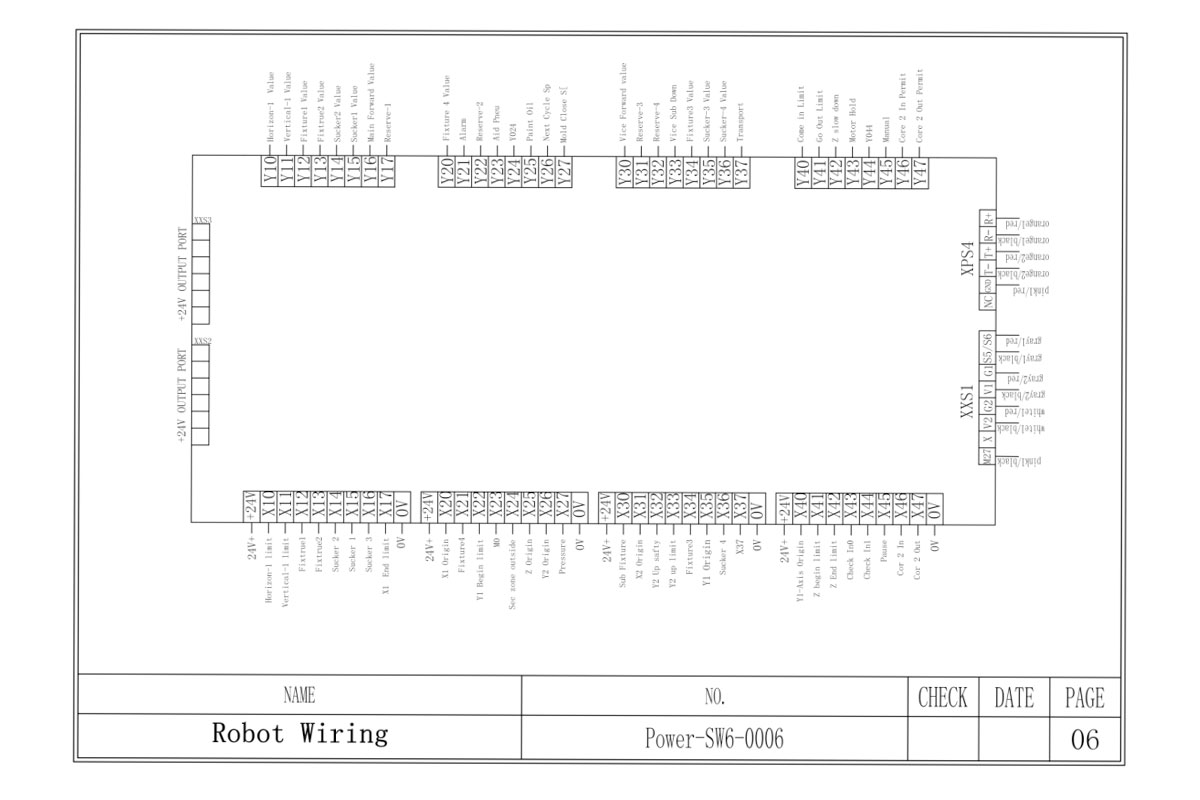
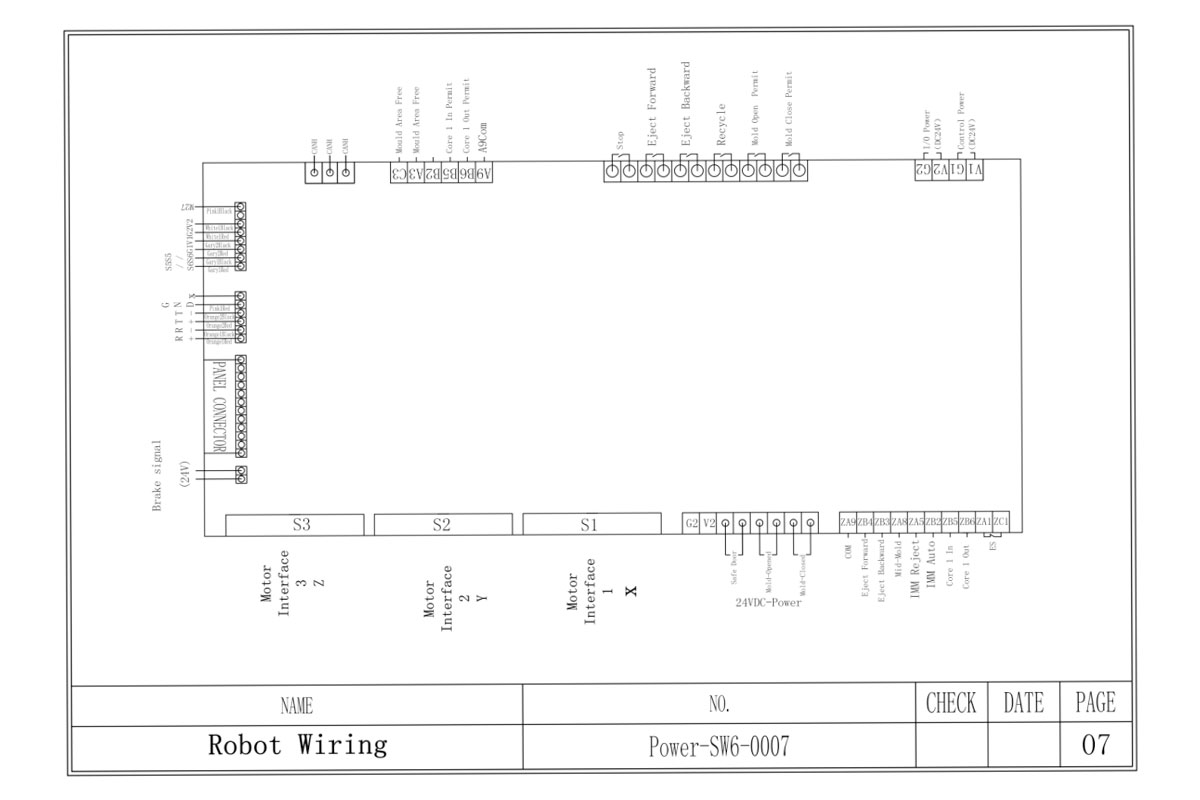
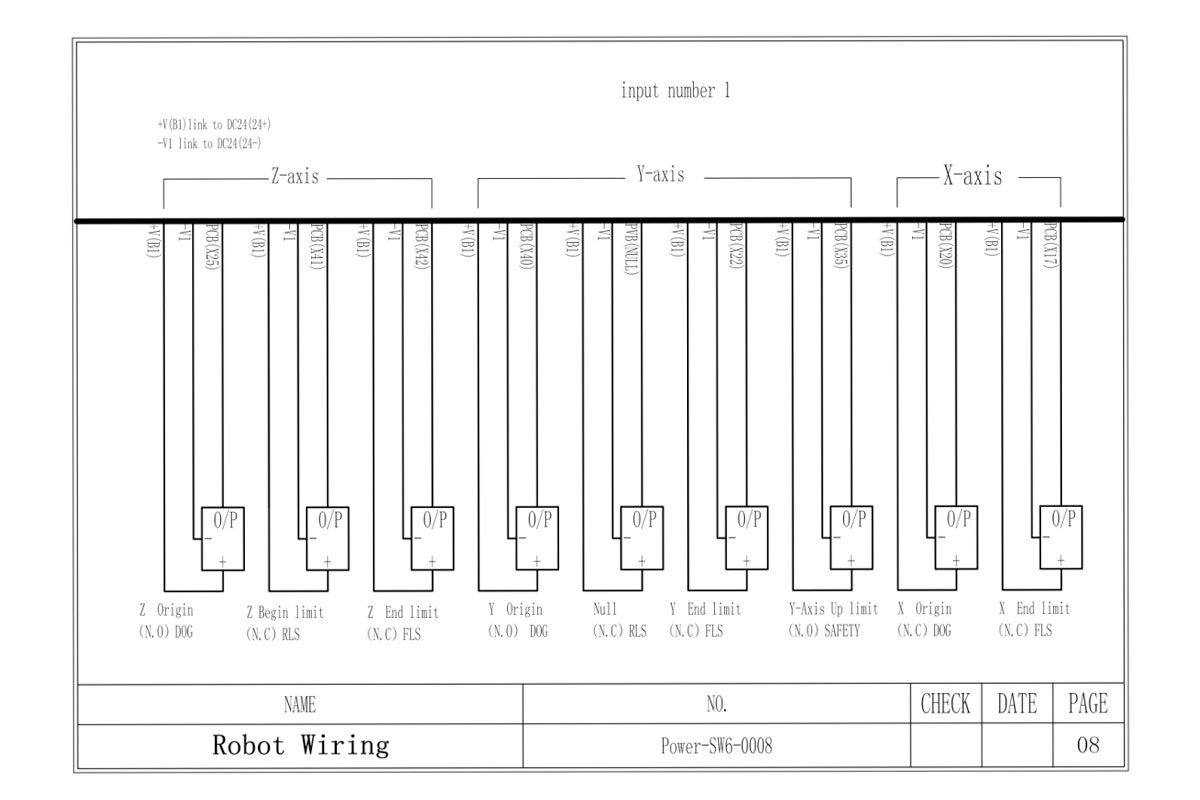
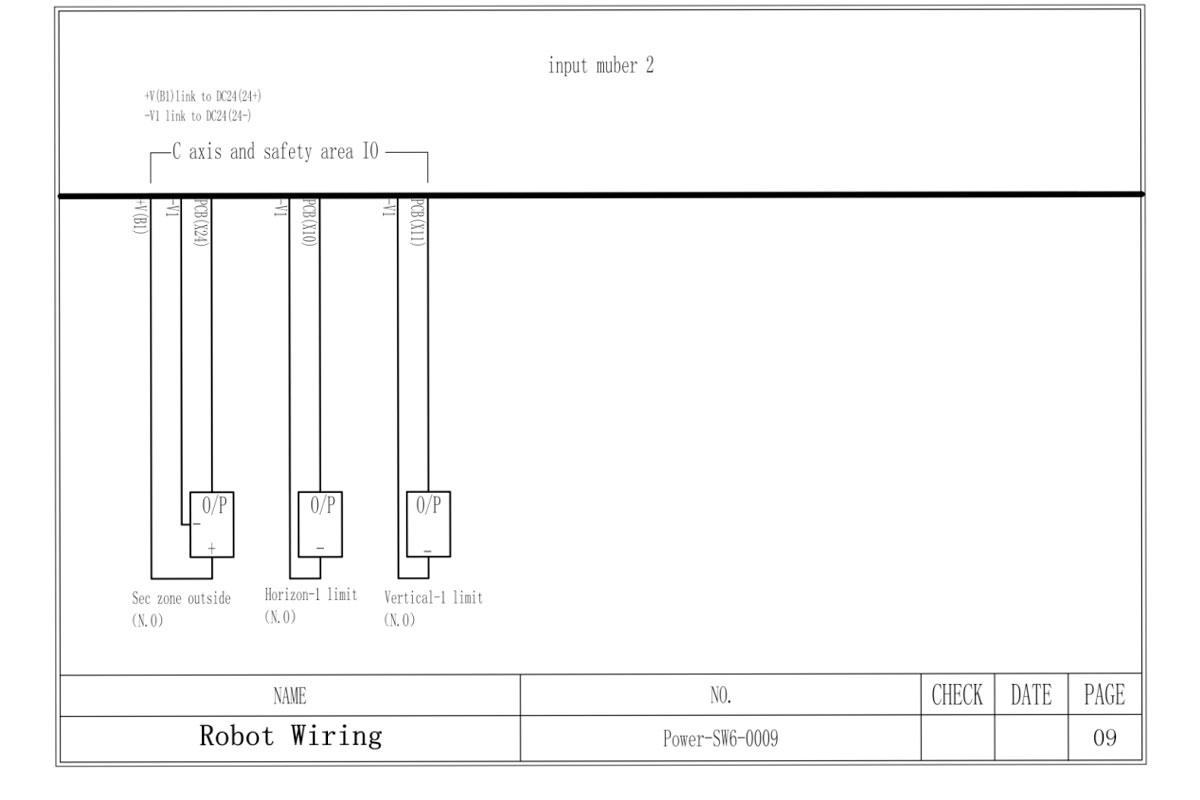
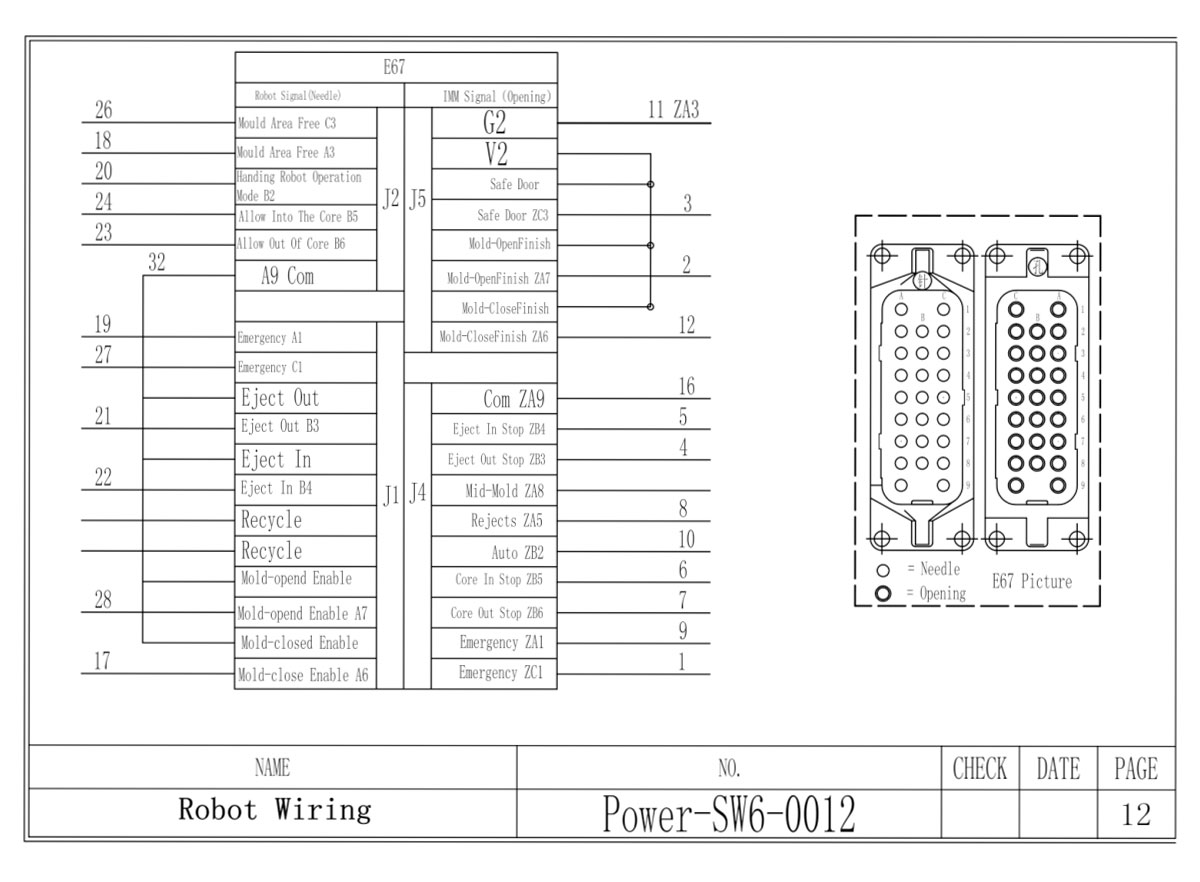
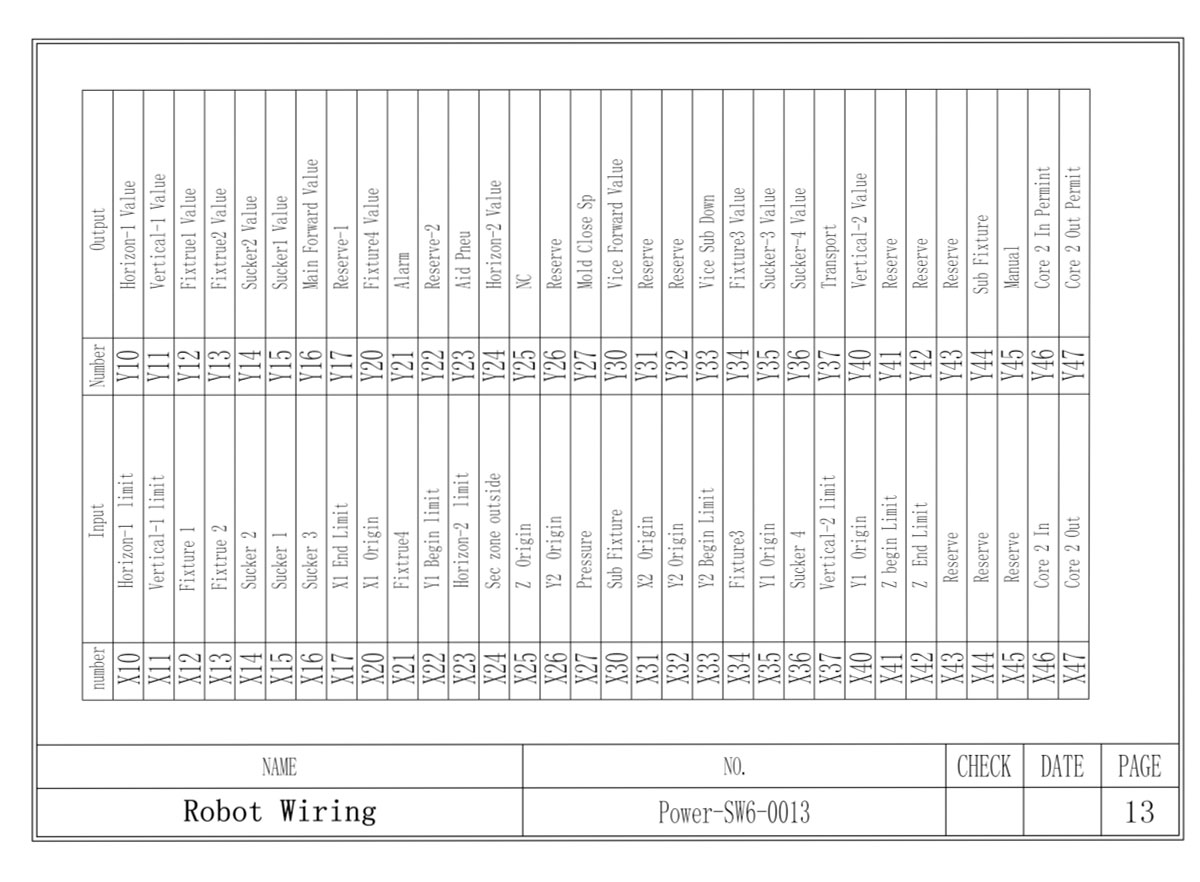
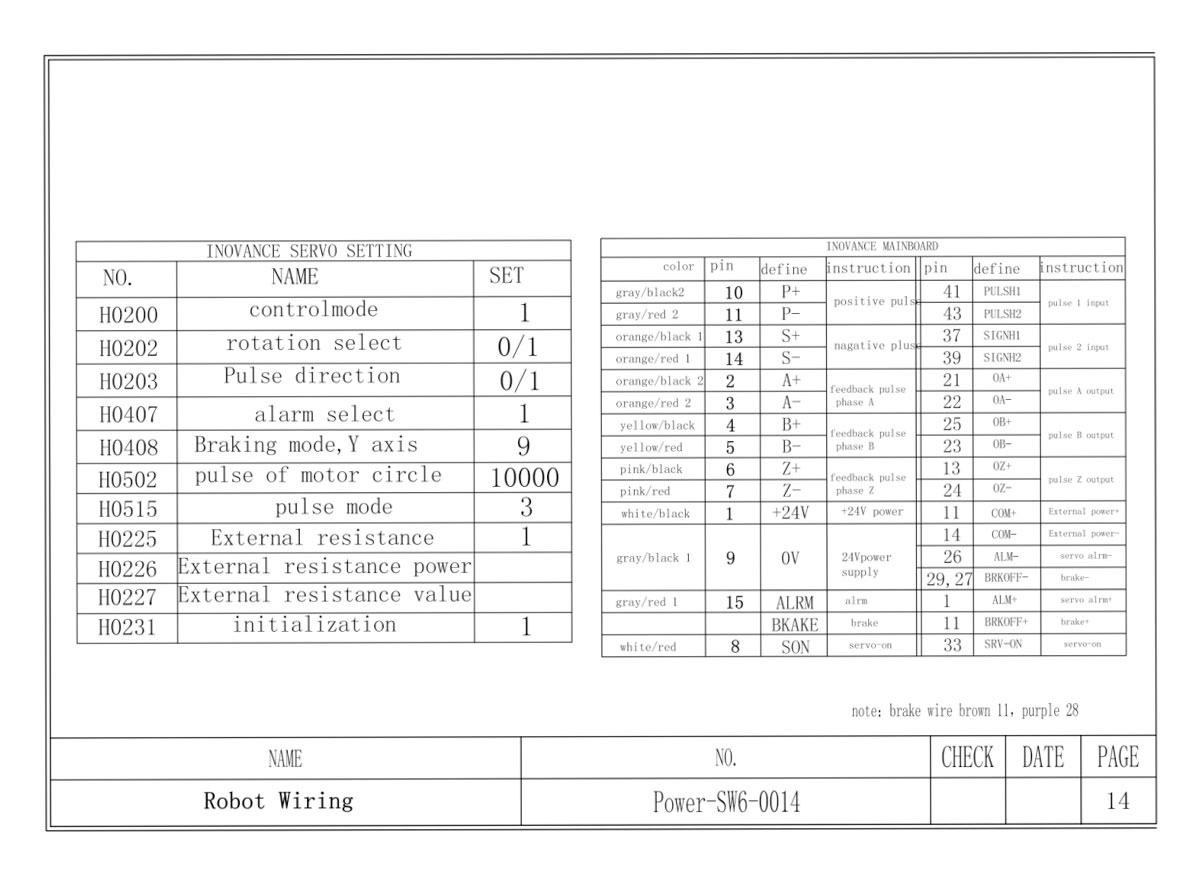
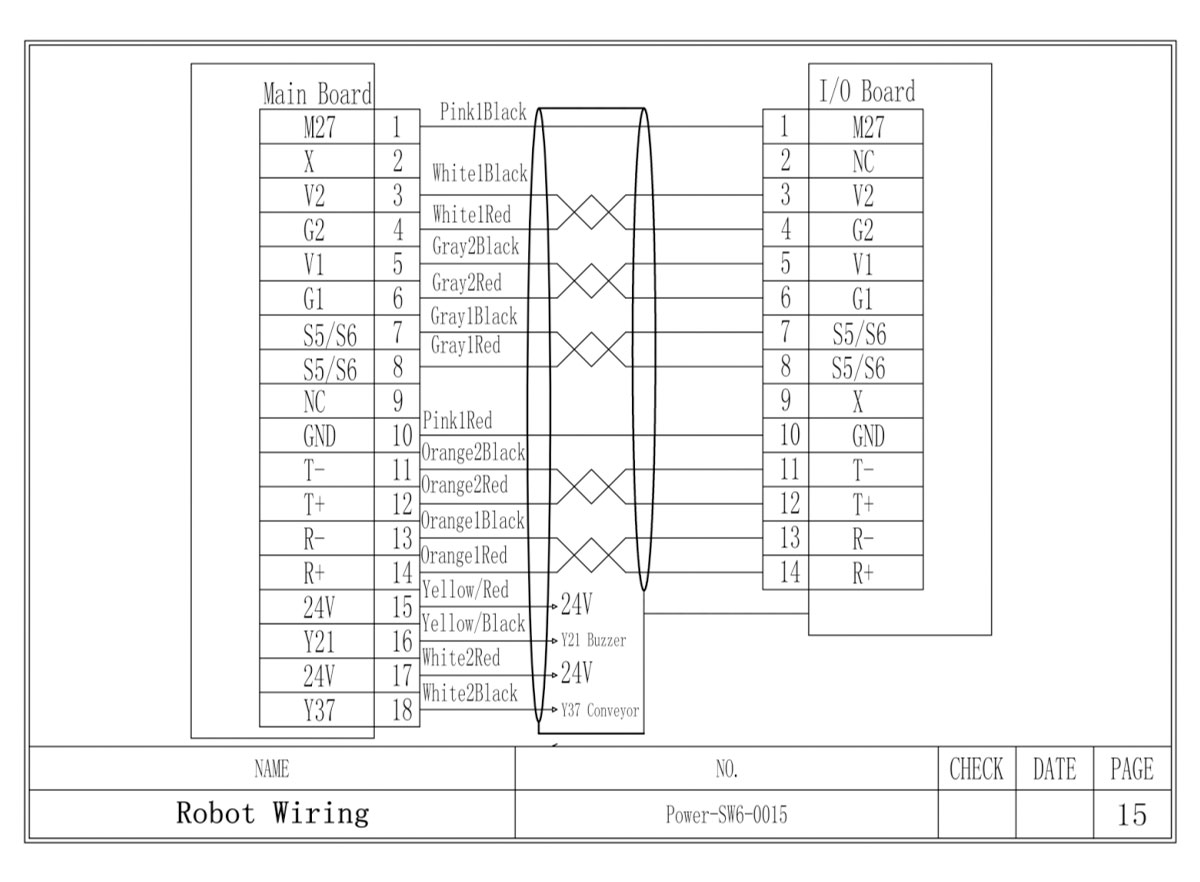
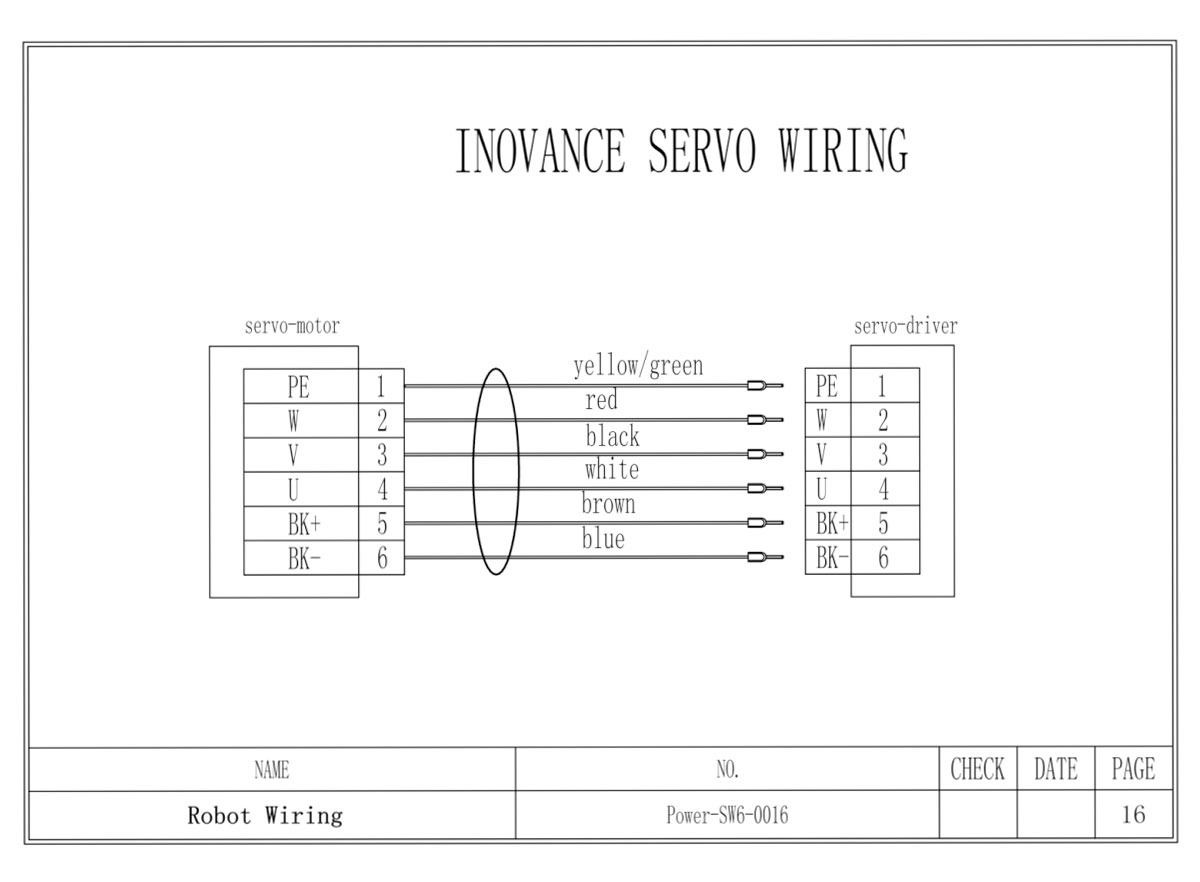
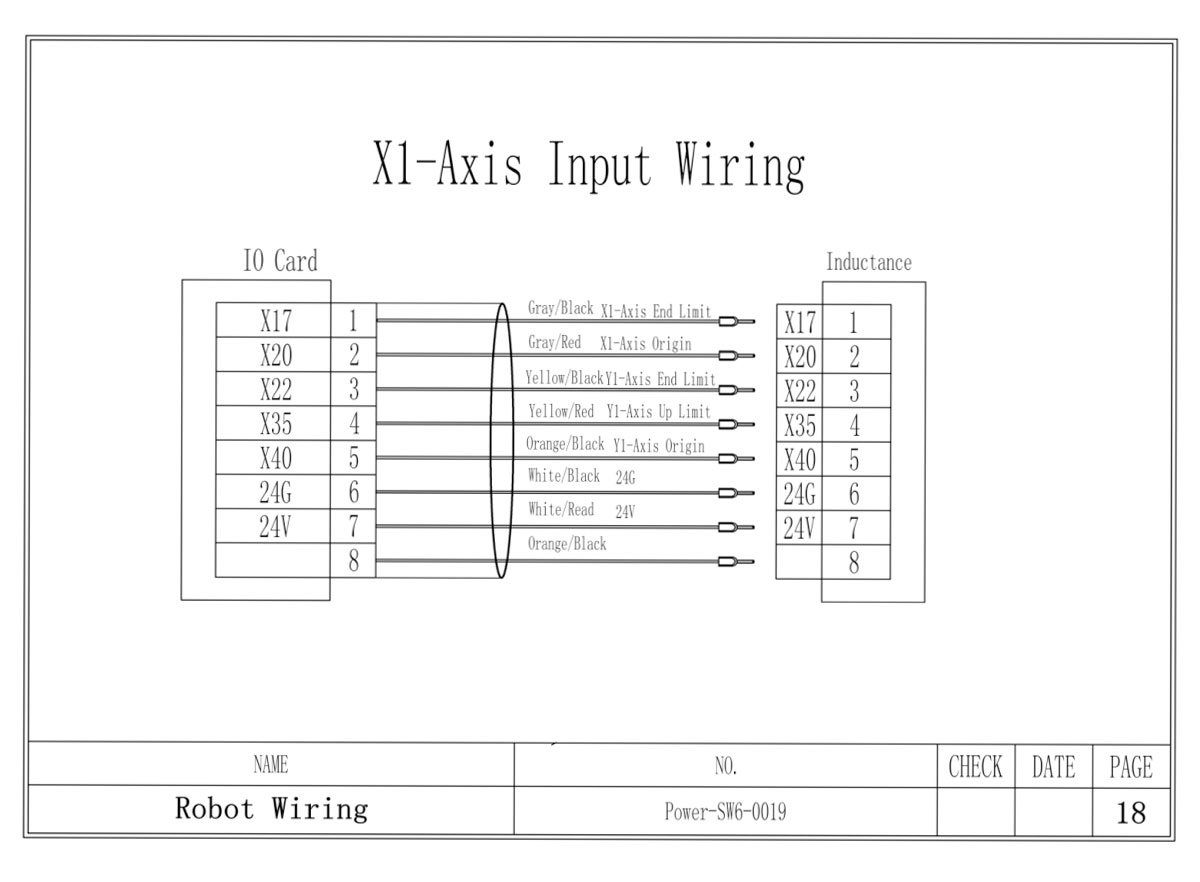
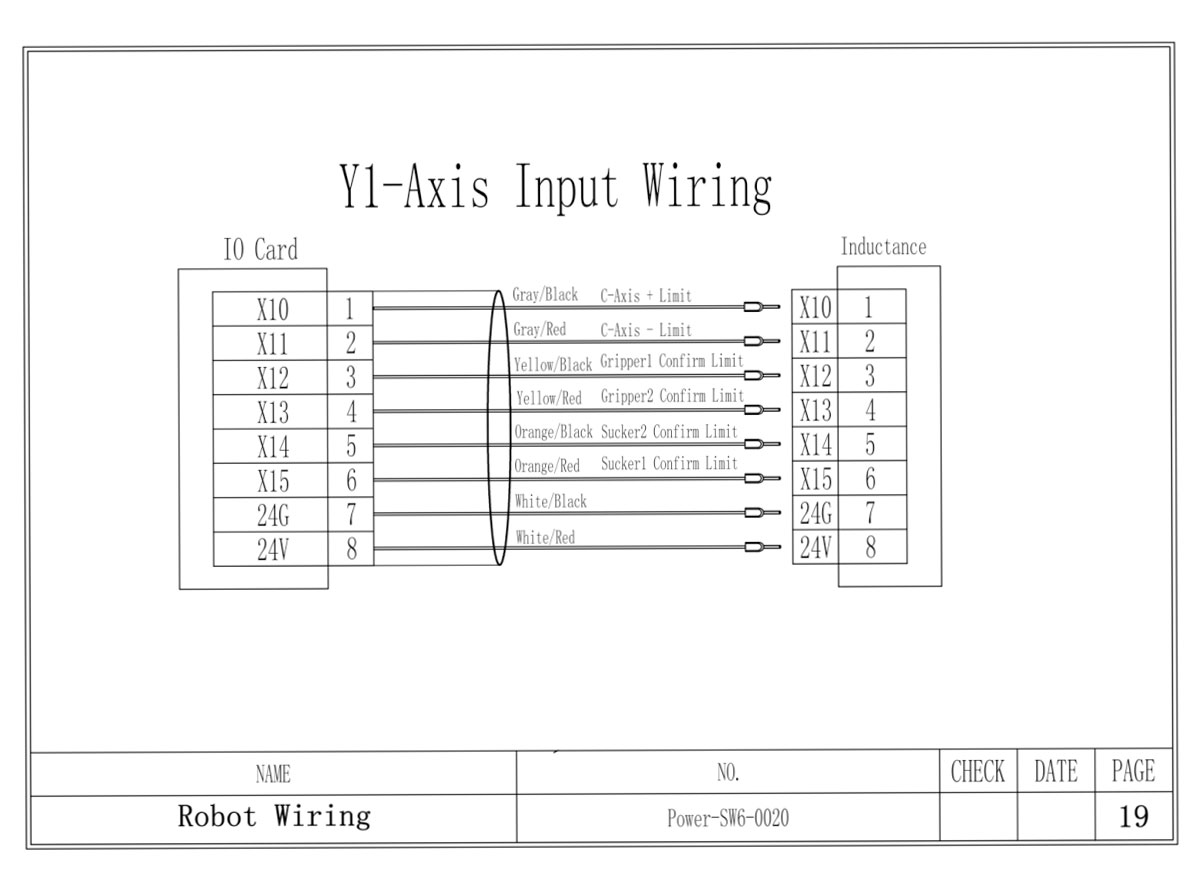
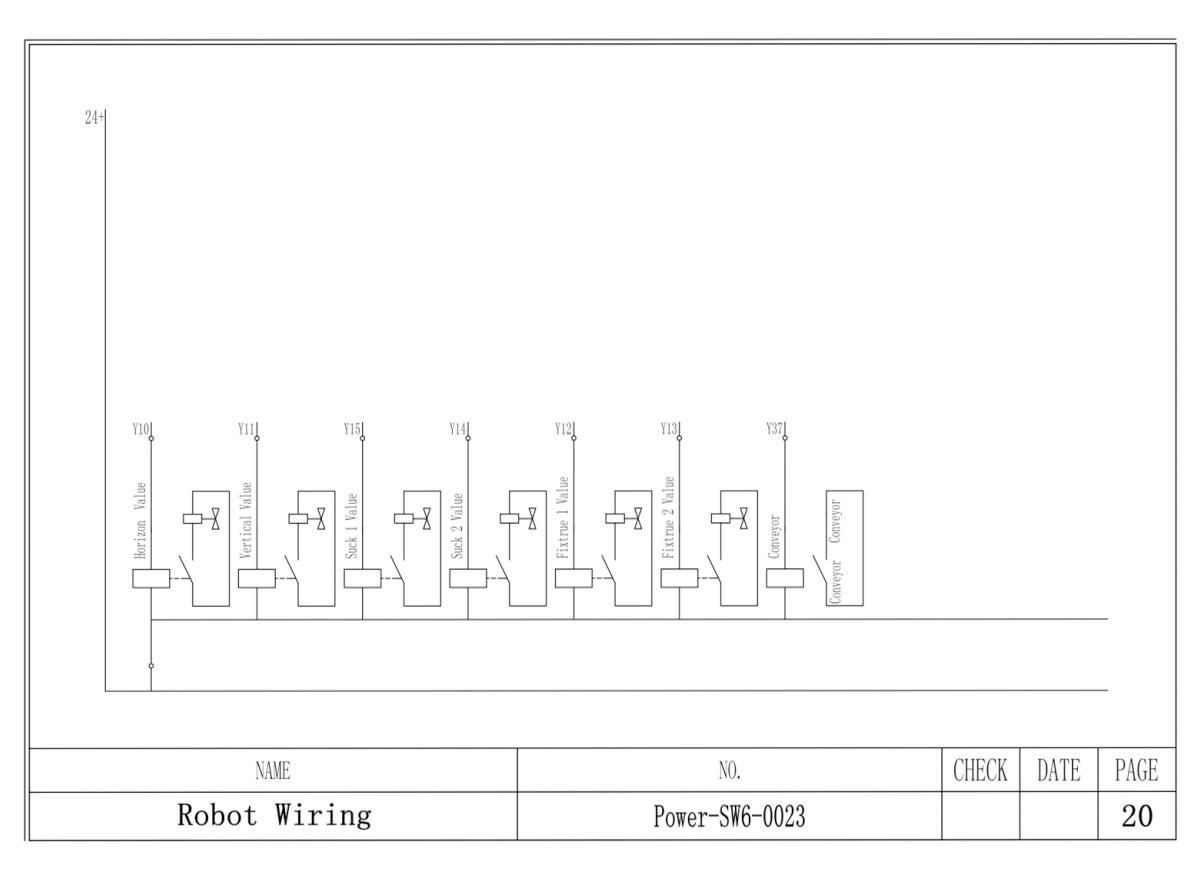
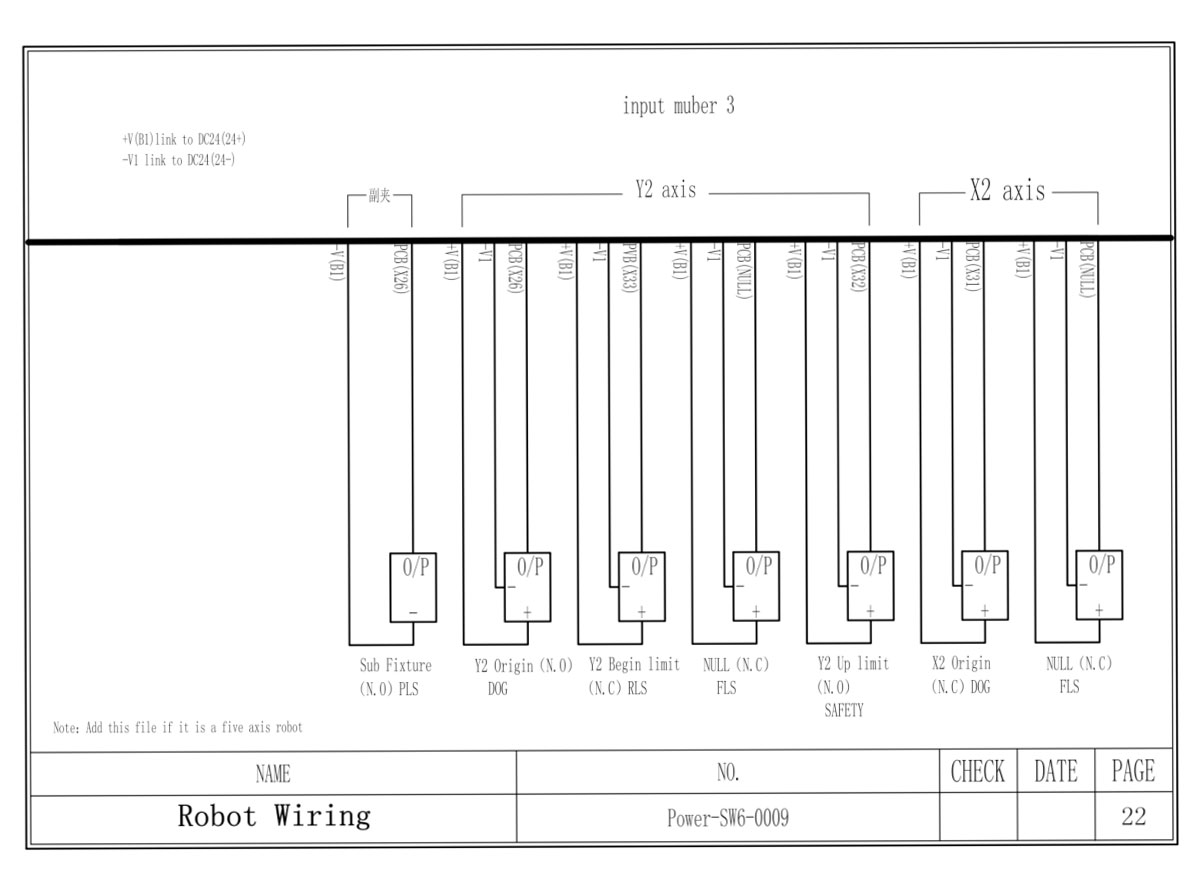
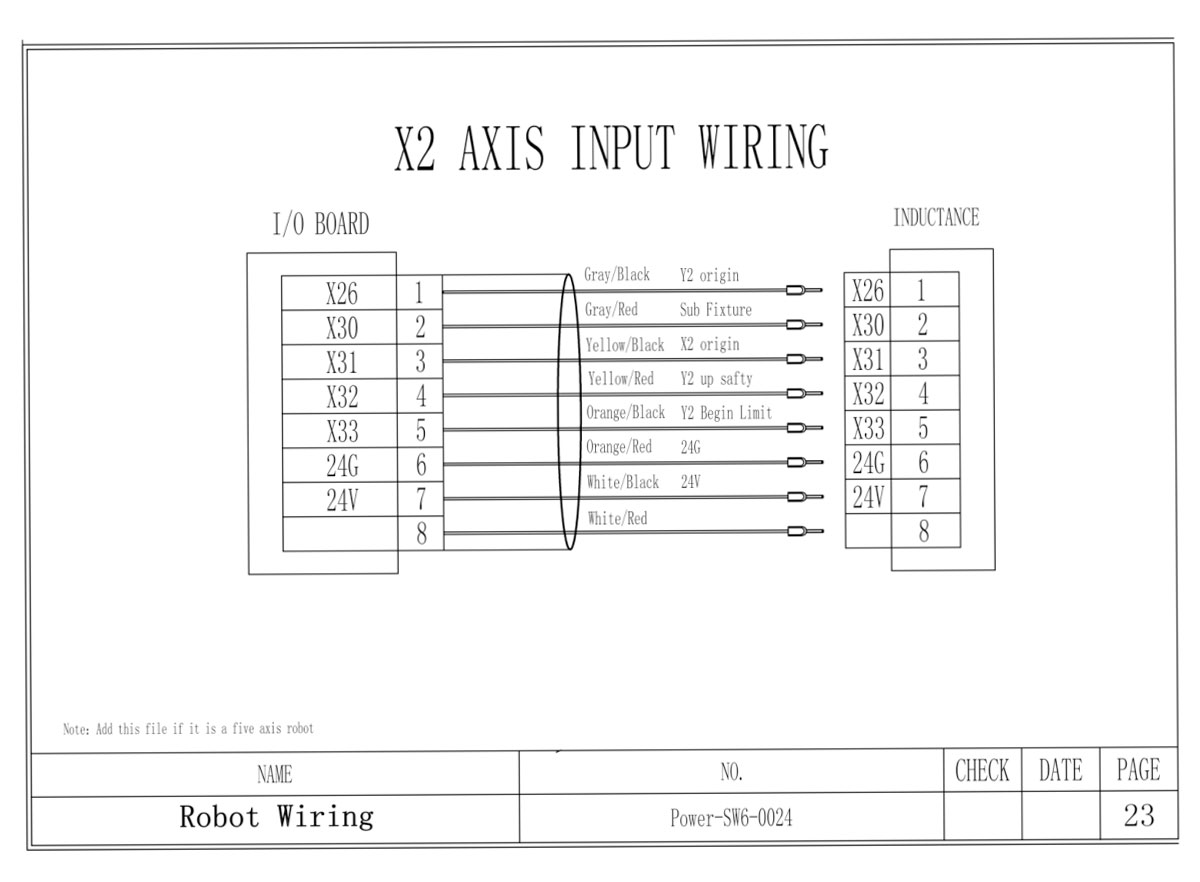
A minor mistake in the wiring of a robotic arm may lead to a disaster in production. Here you can find the detailed wiring diagrams for SWITEK 3/5 axis servo robotic arms for injection molding machine.
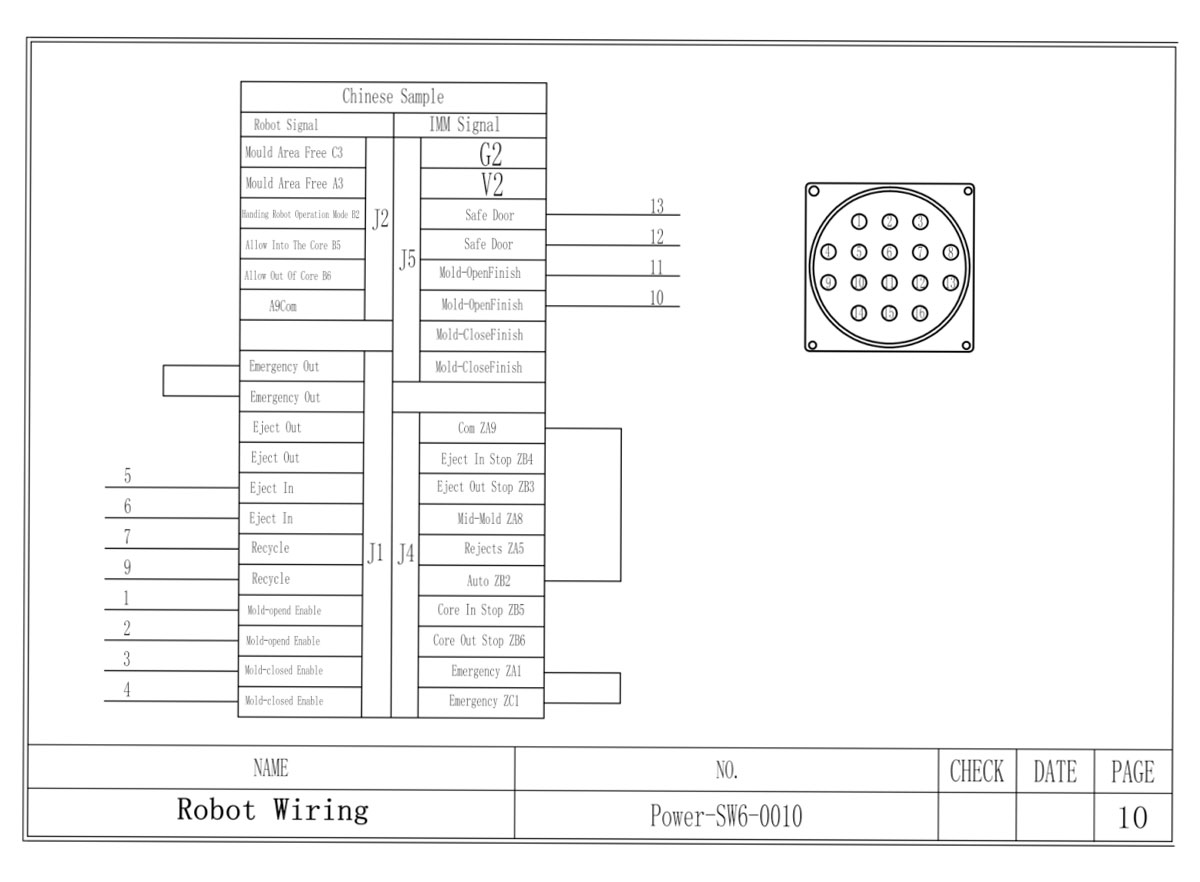
Remark: The JIT interface is very popular among the Chinese and Japanese injection molding machine makers for it's low cost and easy wiring. For most of the Chinese injection molding machine makers the JIT interface would be a standard option and EU12/EU67 interface would be an optional solution with extra charge.


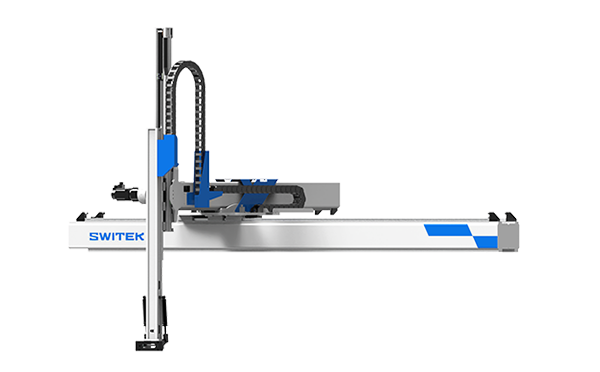
SW7522DS
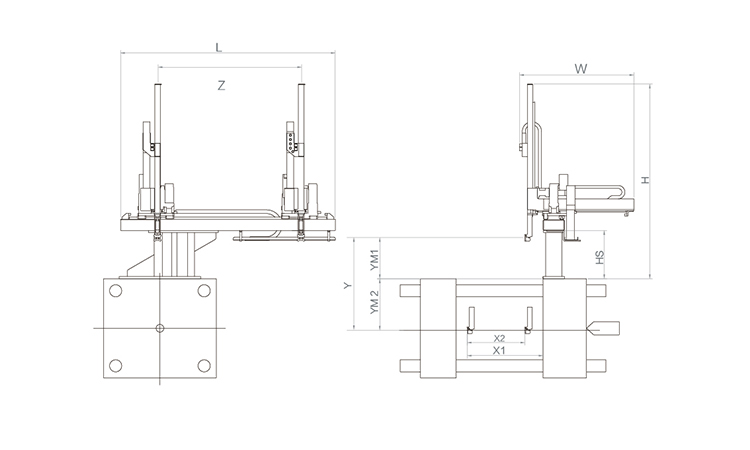
Unit: mm
| X1 | X2 | X3 | X4 | Y | YM1 | YM2 | Z | L | W | H | Payload | 1785 | 1680 | 0 | 0 | 2200 | 650 | 1550 | 3120 | 4160 | 2850 | 2830 | 15kg |
|---|
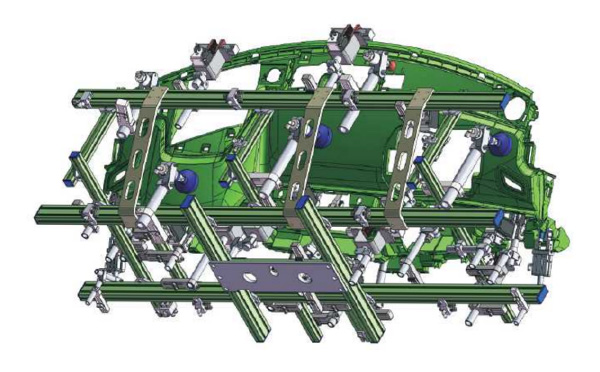
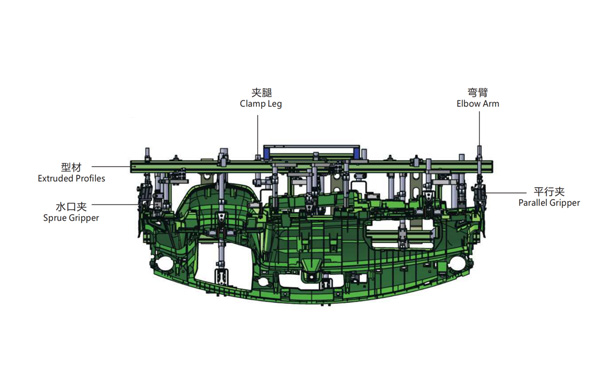
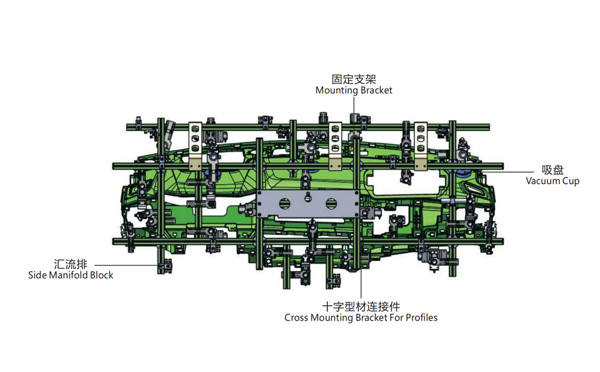
EOAT Assembly Demonstration -- One Cavity Instrument Panel Picking EOAT
Product Descriptions
What's the High Speed 3 Axis Servo Injection Robot to be Recommended for Zhafir VE3600II


