sales06@switek.biz

+86 186 5927 5869

Shopping

Subscrib to Us
sales06@switek.biz
+86 186 5927 5869
Shopping
Subscrib to Us
The manual, stop, automatic are three operating status of the robotic arms for injection molding machines, which the operator can choose by the switch to the top left of the hand controller. Here in this chapter we'll discuss how to operate and program the robotic arm in testing, programming, parameter setting and running it automatically.
To make the robot can run automatically correctly after power on an Origin Position Returned (ORI), driving the robot return to the home position for each axis, sucker and fixture return to the closed is needed.
In the stop mode, press the "Home" button once, then press the "Start" button to return to the home position with each axis Y1(Y2), X1(X2), Z by order. At the same time, a page box comes to remind you that you're ongoing OPR operation and all back to their origin that each electric axis position is 0.
When all axes, sucker and fixture return to the home position, there is an icon on the top right of the screen  , you can operate automatic and manual mode.
You can not operate manual, automatic and modiify setting when OPR, please press the stop button or emergency stop button in case of emergency to stop the OPR.
Turn the knob to the left, the robot will go into Manual Status. As shown below:
5.2.1 Axis Action
Users can not move the arms before set origin, but can operate pneumatic valves.
 | Pneumatic control: Main arm up with pressed once Electric control: Main arm up with pressed. The moving stopped when pressing released. |
 | Pneumatic control: Main arm down with pressed once. Electric control: Main arm down with pressed. The moving stopped when pressing released. |
 | Pneumatic control: Vice arm up with pressed once. Electric control: Vice arm with pressed. The moving stopped when pressing released. |
 | Pneumatic control: Vice arm down with pressed once. Electric control: Vice arm down with pressed. The moving stopped when pressing released. |
 | Pneumatic control: Main arm backward with pressed once. Electric control: Main arm backward with pressed. The moving stopped when pressing released. |
 | Pneumatic control: Main arm forward with pressed once. Electric control: Main arm forward with pressed. The moving stopped when pressing released. |
 | Pneumatic control: Sub arm backward with pressed once. Electric control: Sub arm backward with pressed. The moving stopped when pressing released. |
 | Pneumatic control: Sub arm forward with pressed once. Electric control: Sub arm forward with pressed. The moving stopped when pressing released. |
 | Pneumatic control: The posture turned to vertical position with pressed once. Electric control: The posture moving towards the vertical position when pressed. The moving stopped when pressing released. |
 | Pneumatic control: The posture of the robotic arm turned to horizontal position with pressed once. Electric control: The posture of the robotic arm turned to horizontal position when pressed. The moving stopped when pressing released. |
 | Traverse In |
 | Traverse Out |
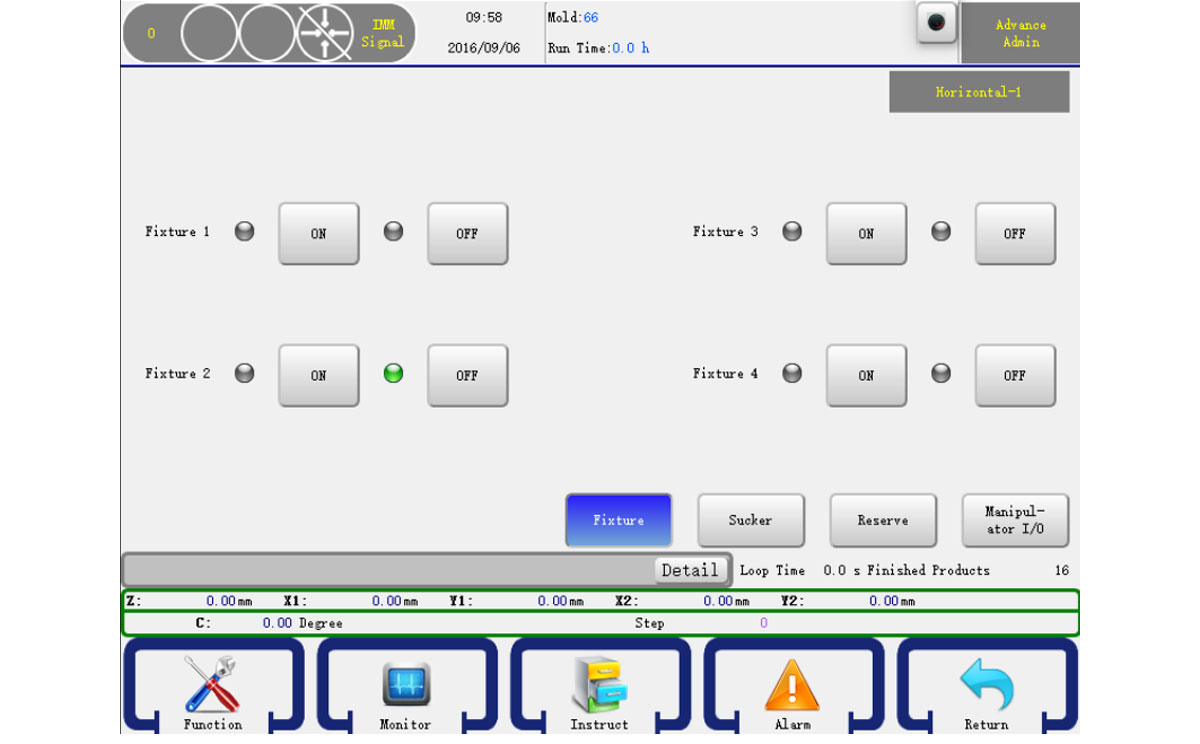
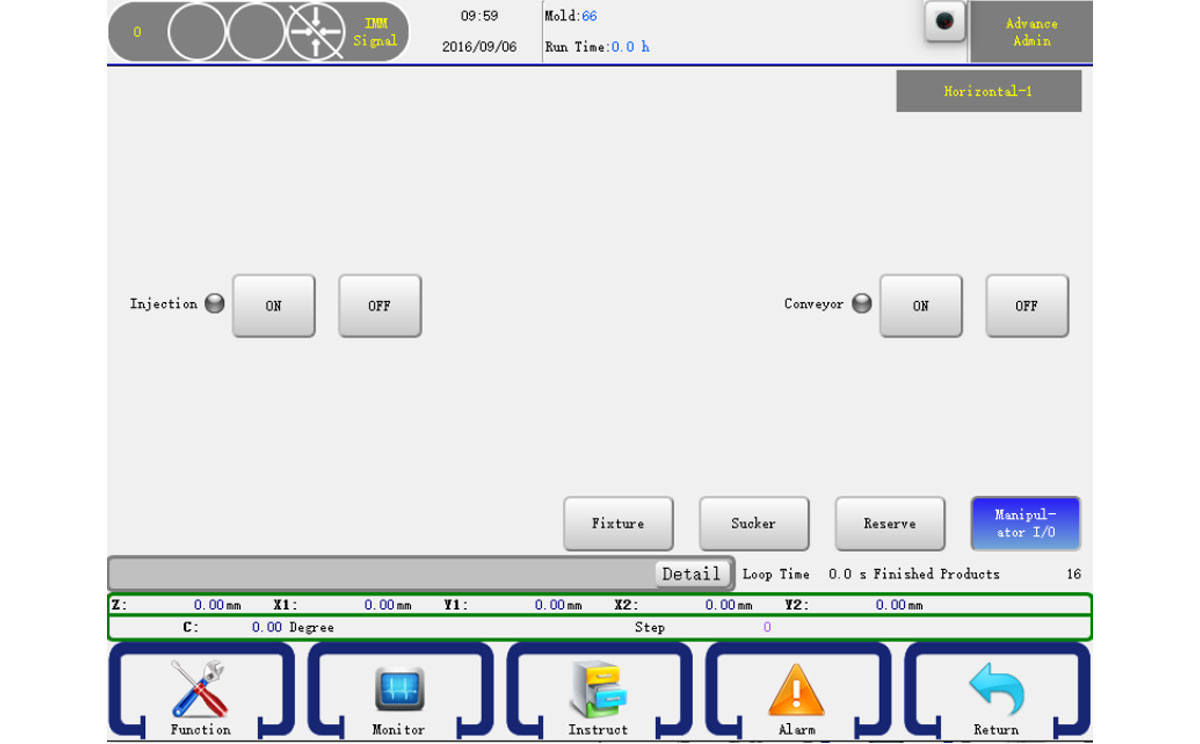
5.2.2 Fixture Action
In the manual page click the Fixture button on the buttom right to go into the manual fixture page as shown below:
Ther are four fixtures. Press ON button to turn it on and press the OFF button to turn it off.
Attention: Input signal shows red and output signal shows green. The input or output indicator is off if there is no signal.
5.2.3 Sucker Action
In the manual page click the sucker button [Sucker] on the bottom right to go into the manual sucker page as shown below:
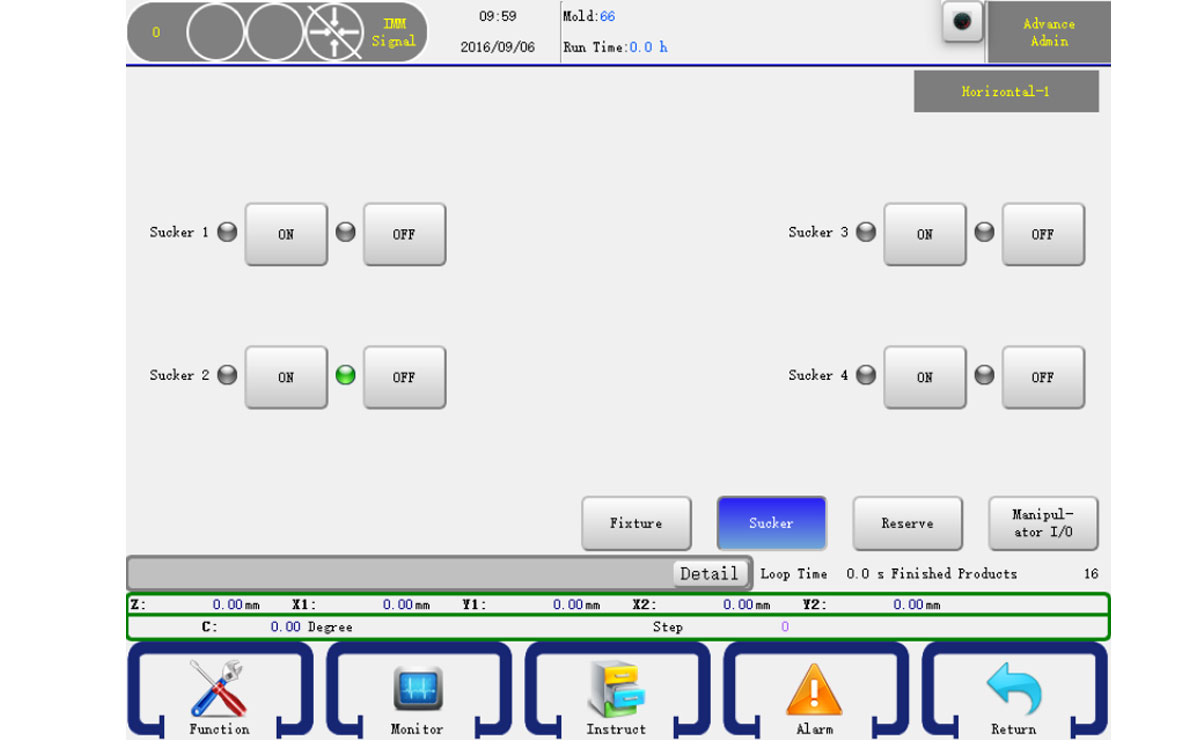
There are four suckers. Press the ON button to turn it on and press the OFF button to turn it off.
Attention: Input signal shows red and output signal shows green. The input or output indicator is off if there is no signal.
5.2.4 Auxiliary Action
In the manual page click the Other button on the bottom right to go into the manual other page as shown below:
The operation is the same as Fixture
5.2.5 Reserve Action
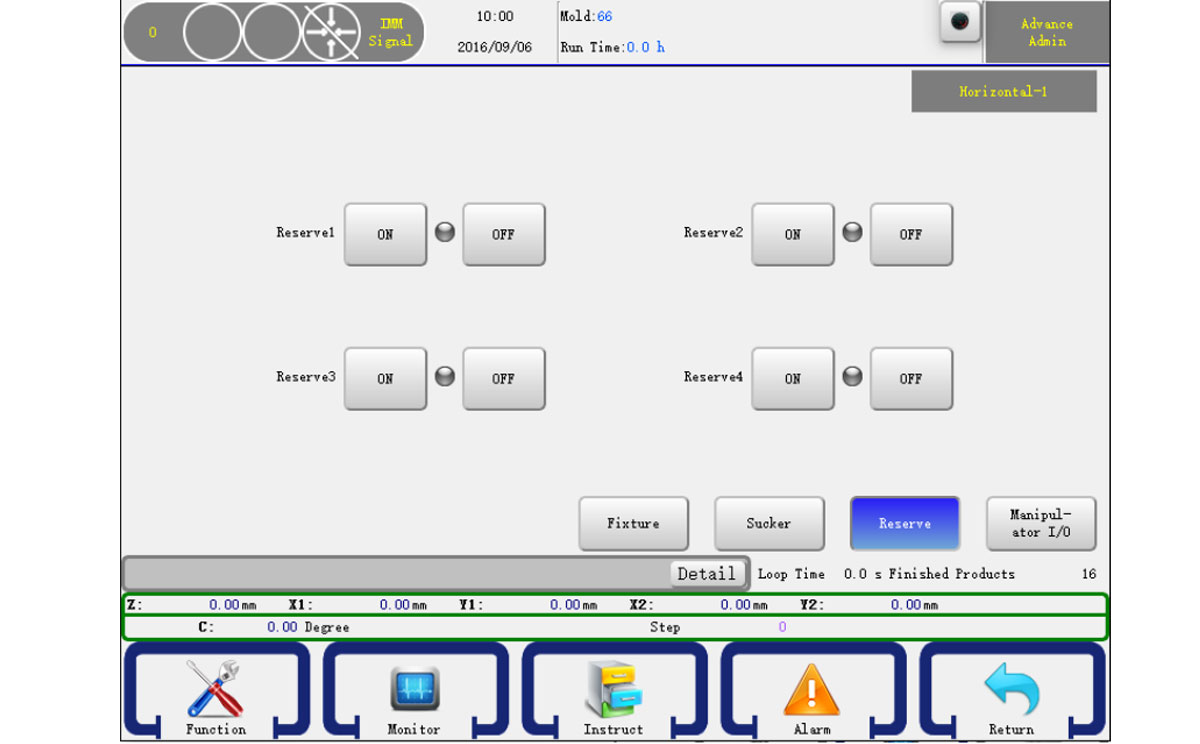
The operation is the same as Fixture
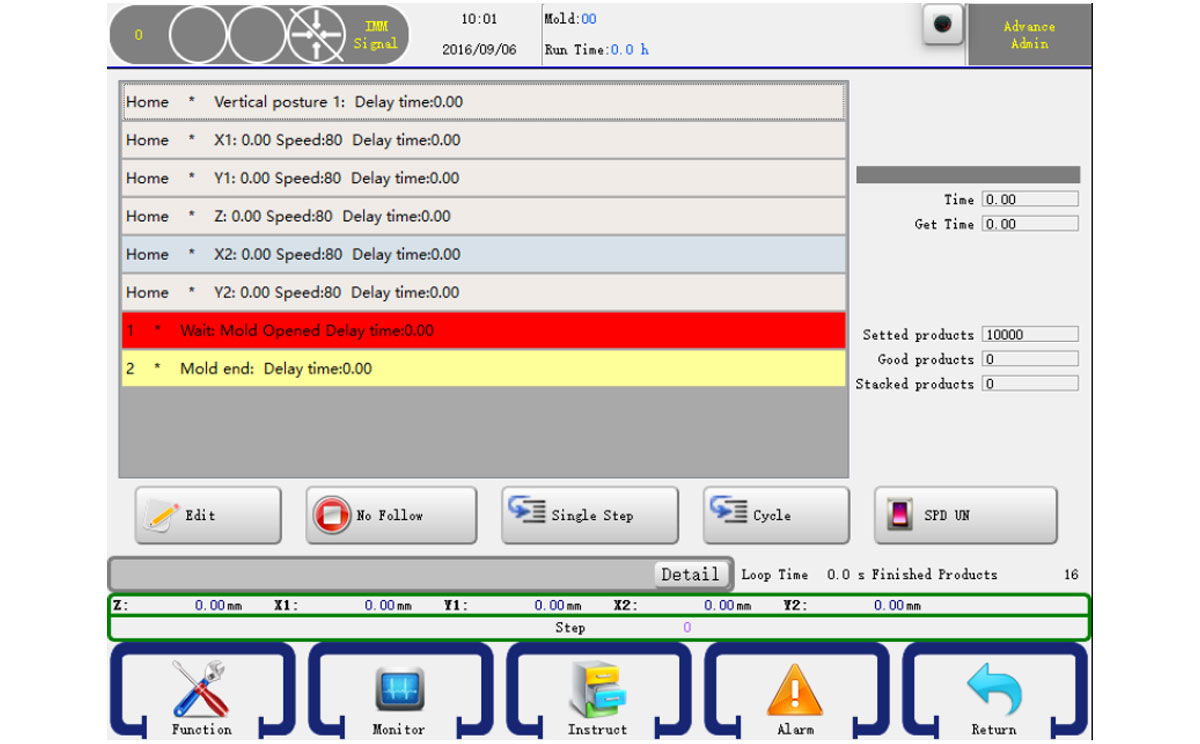
5.3.1 Monitor Auto Running Status
Turn the knob to the right to go into the auto run page. The robot will turn to Auto Ready Status. In this status, press the start button will let the robot turn to Auto Running Status. You can monitor the running status, as shown below.
5.3.2 Adjust Running Configures
In the auto running status, you can modify the action of program configures. Just select a step and then click the edit button will show an editor dialog, after you click "OK", those data would be accepted and in the next cycle will be run according to your setting, if you press "Cancel" to cancel the operation.
To ensure that those setting won't make the robot, machine, mold damage, within 5mm range is allowed. As shown below:
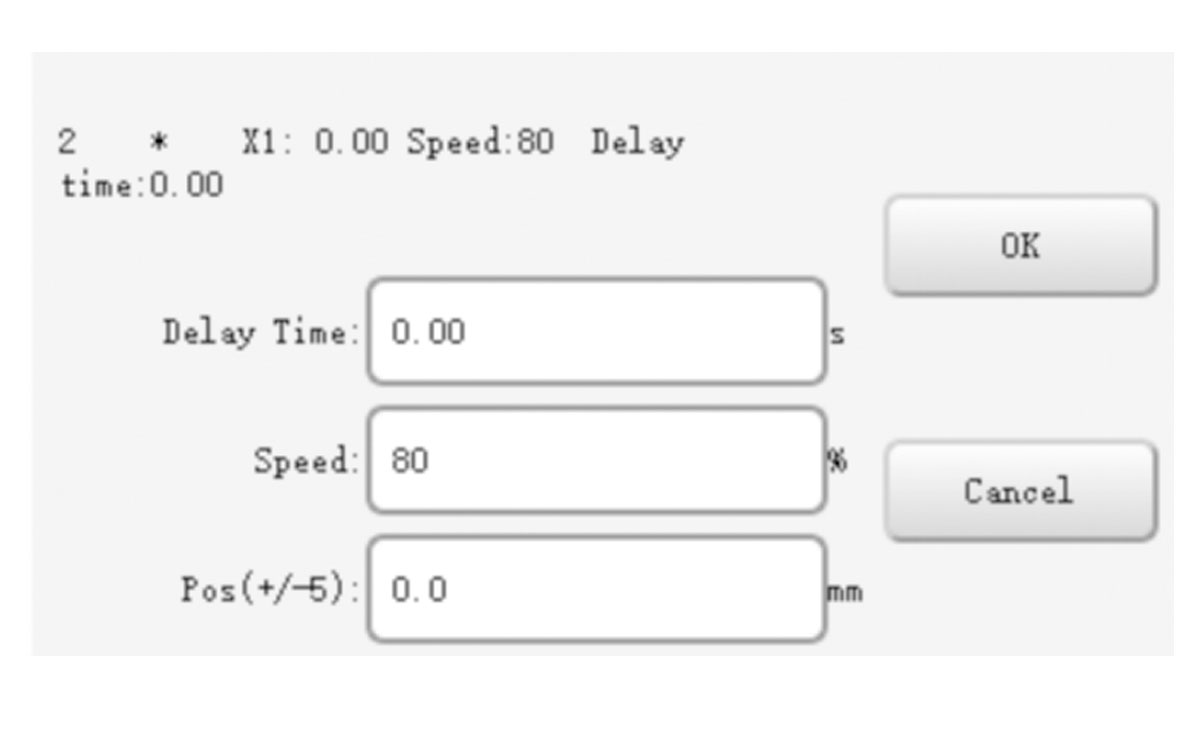
After you finished, just click the OK button to confirm your change.
5.3.3 Single Step Running
On the auto running status, you can click the single button to run a step. Click again will run the next step, as so on. This feature is very useful when debug your program.
5.3.4 Speed Adjustment
Click "Speed button" so that it becomes "Speed display" to adjust the overall speed by pressing "Speed adjustment" on the Key board and the panel on the lower left corner.
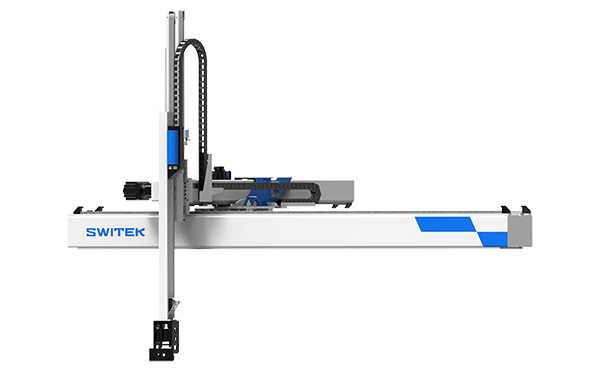
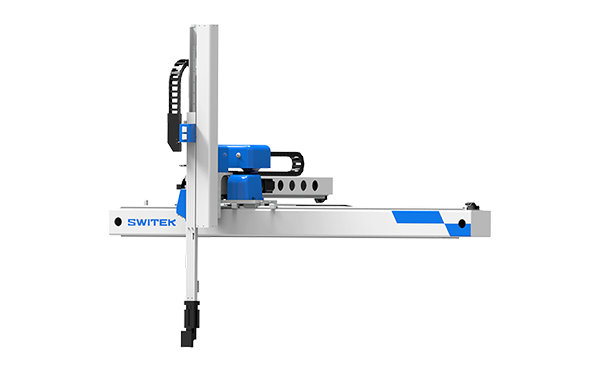
SW7725DS
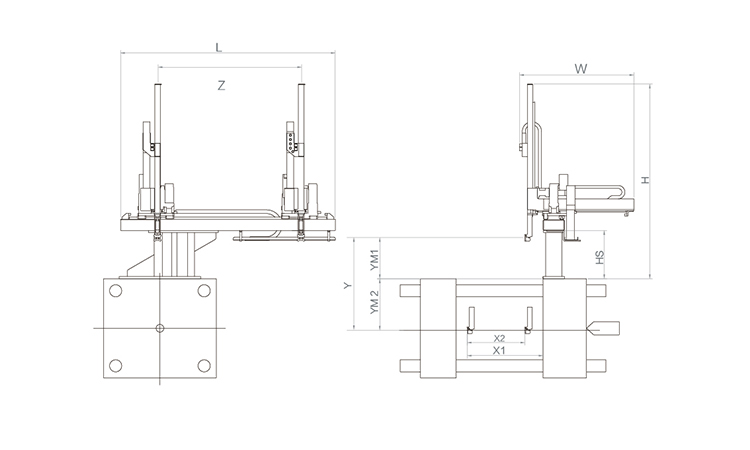
Unit: mm
| X1 | X2 | X3 | X4 | Y | YM1 | YM2 | Z | L | W | H | Payload | 2250 | 1720 | 0 | 0 | 2500 | 680 | 1520 | 4000 | 5050 | 3005 | 3200 | 50kg |
|---|
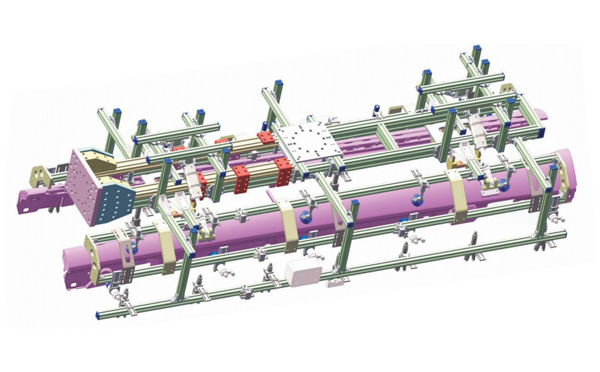
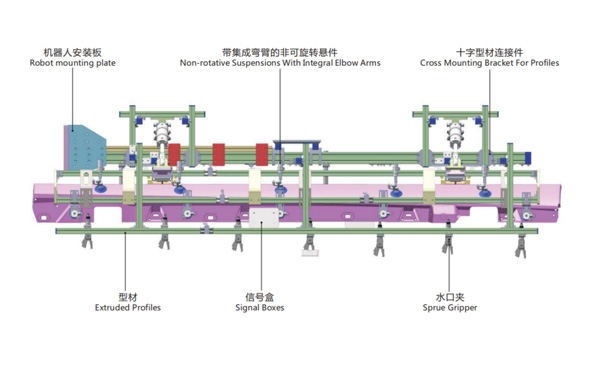
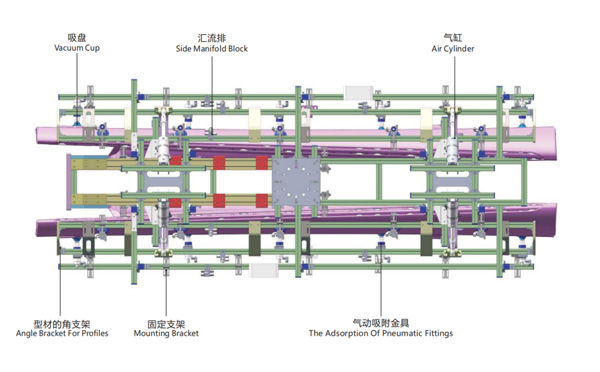
EOAT Assembly Demonstration -- One Cavity Car Threshold Strip Picking EOAT
Product Descriptions
Why There's An Additional Static Charge Ring Installed to Some IML System?
For visitors of SWITEKK website will find that for the IML system no matter if it's side entry IML robot or Top Entry IML Robot, you can see a ring just outside the mold area in some of the IML system but not to the other IML system. Why would it happen and what's the function of this ring to the IML system?
The ring installed is a static charging ring. For a better understanding of the function of this static charging ring we'll need to know the types of the labels which we're using in an IML project. For an IML container made from PP (Polypropylene) there're two main types of IML labels, the regular material IML labels which could be easily static charged from the inner side of the label and the metallic label of which has a metallic layer will releas the static immediately. In this case we'll need to have the label static charged from outside of the label. That's why an extra static charging ring is to be installed to the IML system to ensure that the metallic IML label could be well static charged.
For more knowledge about IML and IML solutions just follow up https://www.gechiml.com for the up to date solutions of IML from SWITEK automation and contact Adams for a turn-key solutions of IML.