sales06@switek.biz

+86 186 5927 5869

Shopping

Subscrib to Us
sales06@switek.biz
+86 186 5927 5869
Shopping
Subscrib to Us
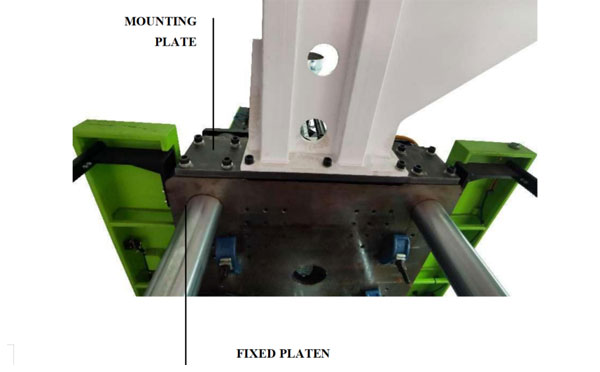
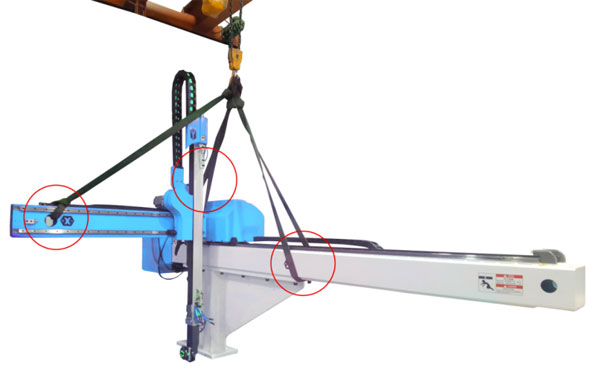
The robotic arms for the injection molding machines would be installed to the top of the injection molding machine, the installer of the robotic arm must keep the SAFETY INSTRUCTION in his mind throughout the installation process. Here in this chapter you'll have a detailed guide line of how to fix the robotic arm to the injection molding machine safely step by step.
First check the robot base plate or transfer plate if it's match to the injection molding machine mounting plate?
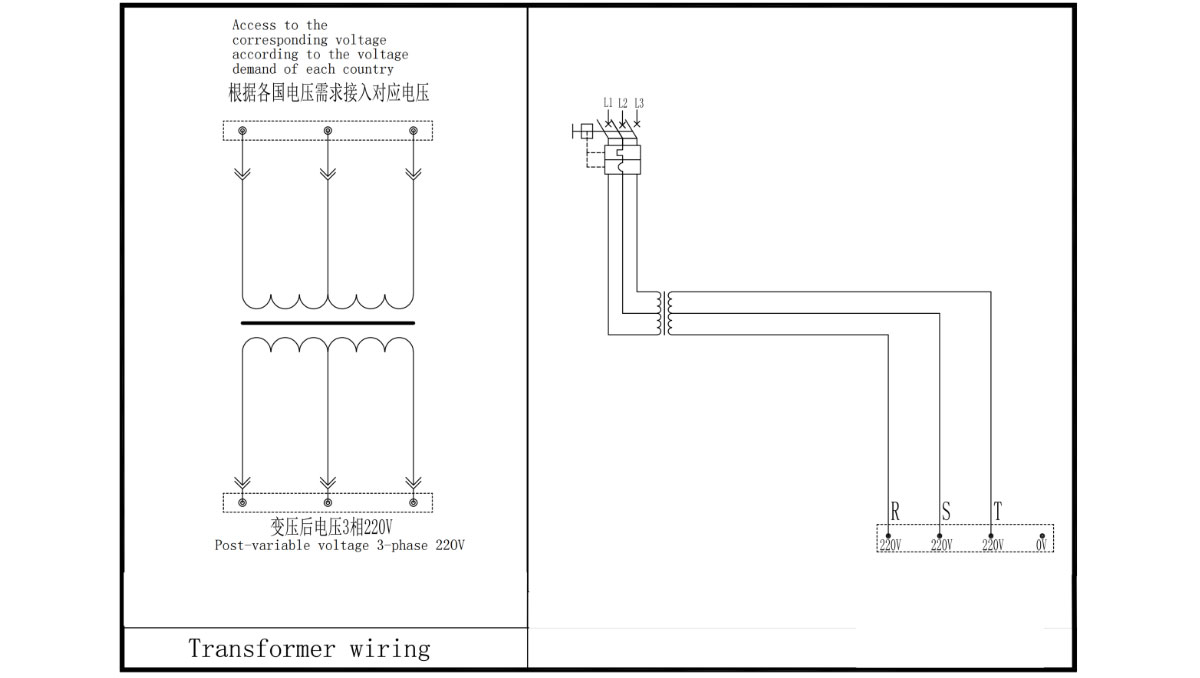
Connecting the Power Supply -- Power Wiring via a transformer
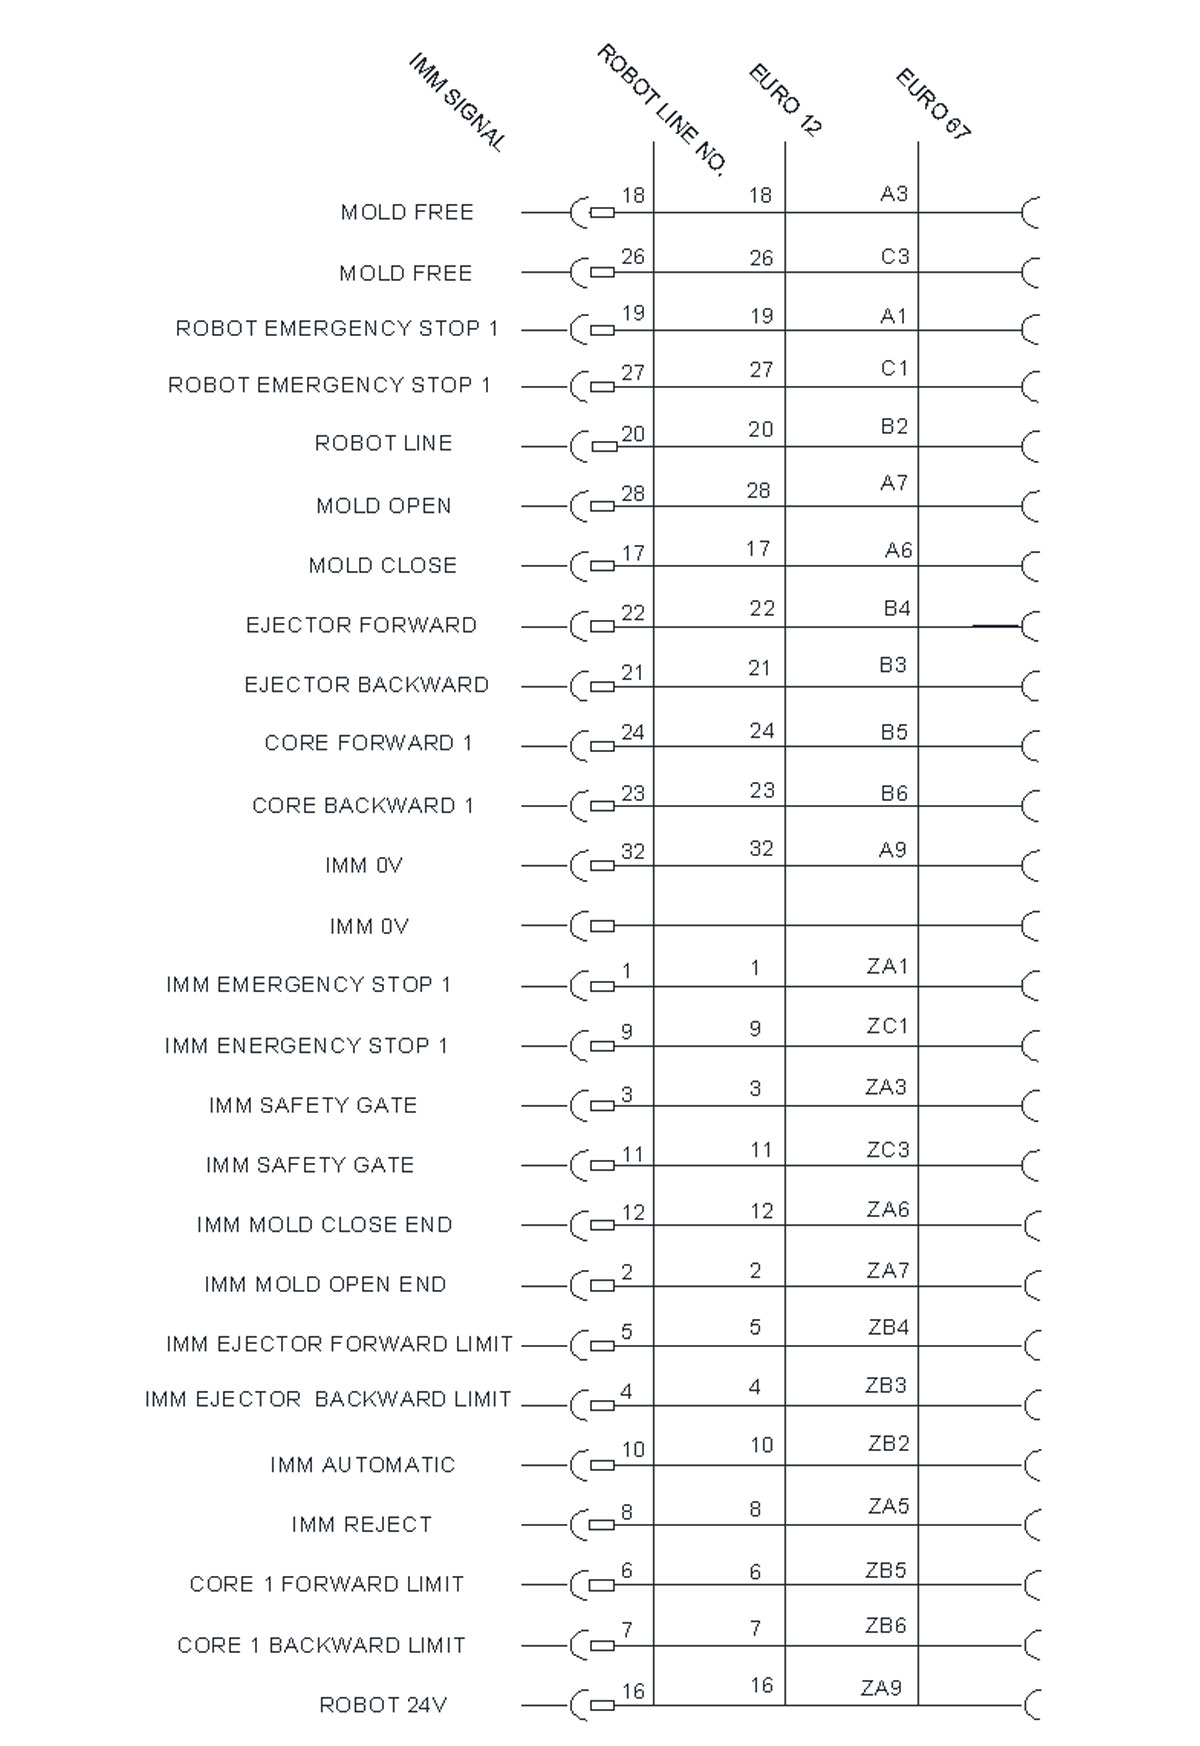
Communication with the Injection Molding Machine -- EU12/EU67/JIS
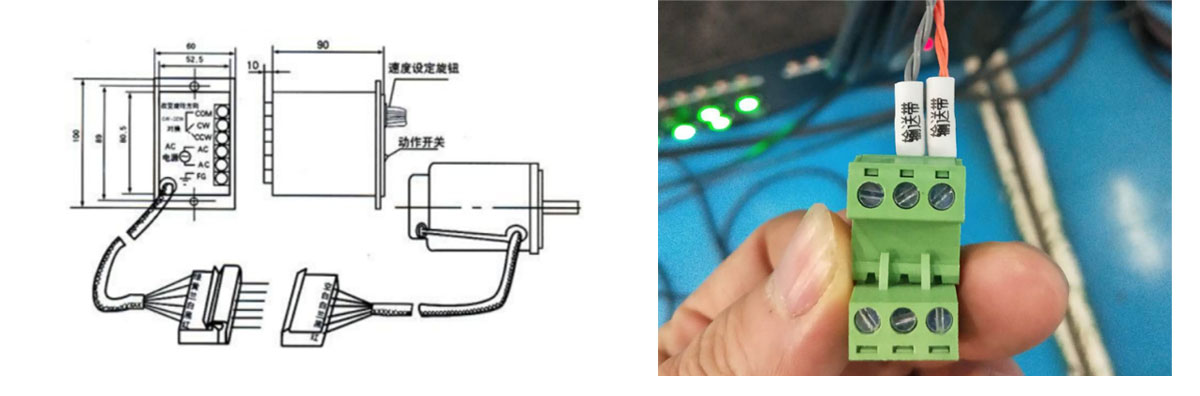
COM points and CW/CCW points inside the conveyor belt control box are connected to his joint on the robot.
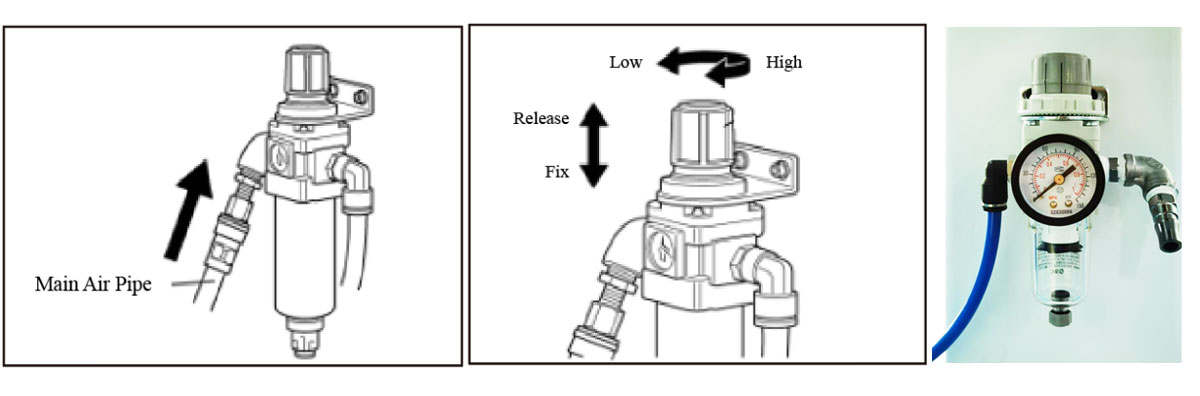
Please connect the prepared main air pipe to the "IN" of the pressure reducing valve of the air filter
NOTE: the pressure of the two pressure gauges must not be less than 0.5mpa, and the air source must be kept dry
All pipe and air pipe should be regulated and fixed by rolling tape and kept away from high temperature and hot areas.
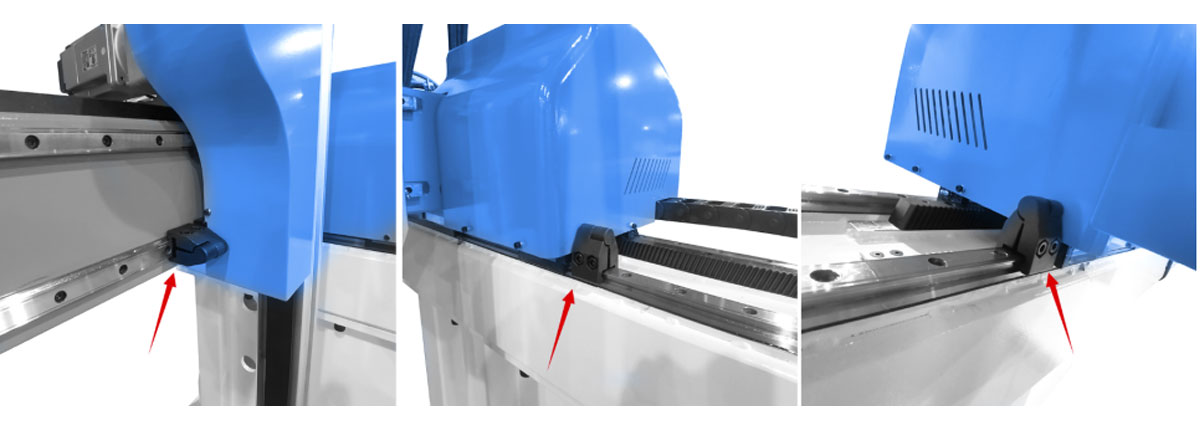
AREA 2: For the injection molding machine and the manipulator to connect and exchange signal visual area.

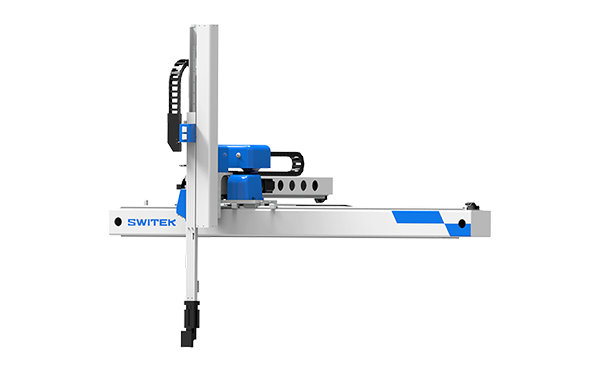
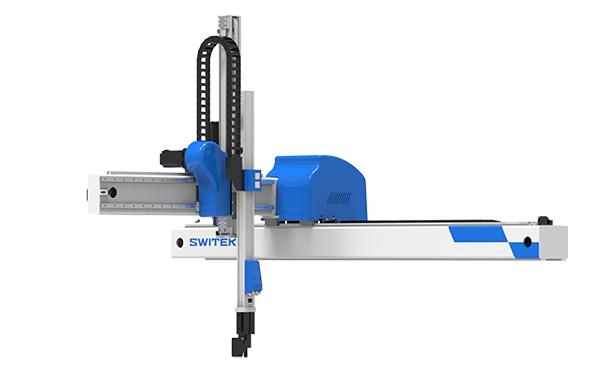
SW6308-20
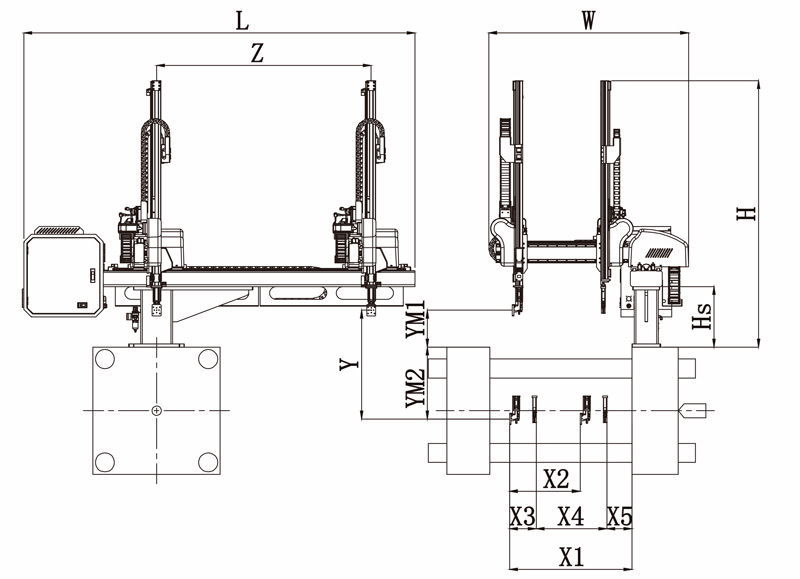
Unit: mm
| X1 | X2 | X3 | X4 | Y | YM1 | YM2 | Z | L | W | H | Payload | 980 | 640 | 165 | 645 | 800 | 235 | 565 | 1280 | 2320 | 1500 | 1690 | 3kg |
|---|
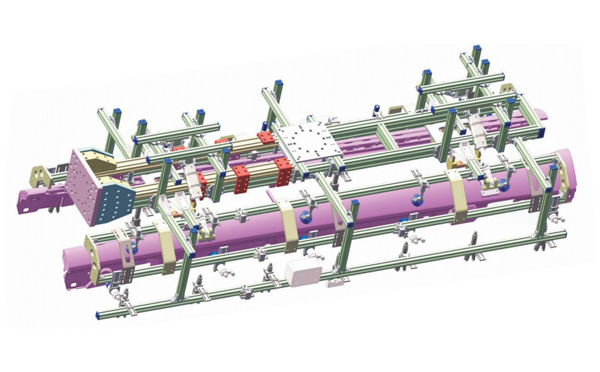
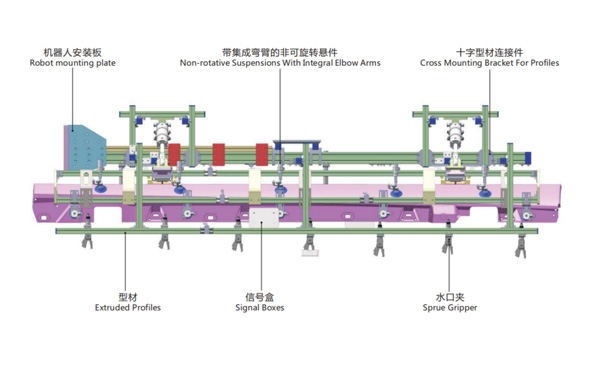
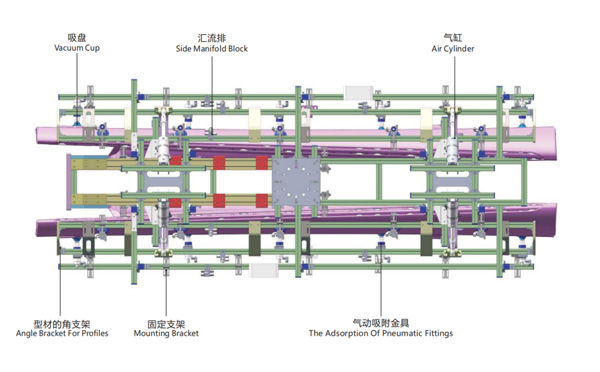
EOAT Assembly Demonstration -- One Cavity Car Threshold Strip Picking EOAT
Product Descriptions
For a Bucket Injection Production System with Haitian Jupiter Series Two Platens Injection Molding Machine, which Robot is the Best for It?
JU4500 is a medium sized two platen hydraulic injection molding machine by Haitian group with a clampling force of 4500kN. As a two platen injection molding machine it has a much shorter body length and is an ideal choice for the production of deep cavity products such as buckets etc., below is the general parameters of it:
For a bucket production project with JU4500 we have two recommendation, one is for the production of the plain bucket which the robot will do the picking and stacking only, the robot to recommend is SWITEK 3 axis servo injection robot SW6712DS-20 which has a payload of 6kg and is an ideal choice for the picking and stacking of the buckets; the other is a bcket production project with IML, which the robot will not only pick and stacking the bucket but also have the label put into the mold, the robot to recommend is SWITEK SW7312DS, with kick-back design, it'll will provide more space for the EOAT.
For more information about robot selection for Haitian injection molding machine please contact Adams from SWITEK to get a professional advisory of robot selection for your injection automation solutions.