sales06@switek.biz

+86 186 5927 5869

Shopping

Subscrib to Us
sales06@switek.biz
+86 186 5927 5869
Shopping
Subscrib to Us
The operate panel is the interface from where the operator to communicate with the robotic arm. It'll enable the operator to start, stop, programm, adjust the speed of each axis of the robotic arm. Here in this chapeter we'll have a brief introduction of the operate panel of the robotic arm controller (HMI).
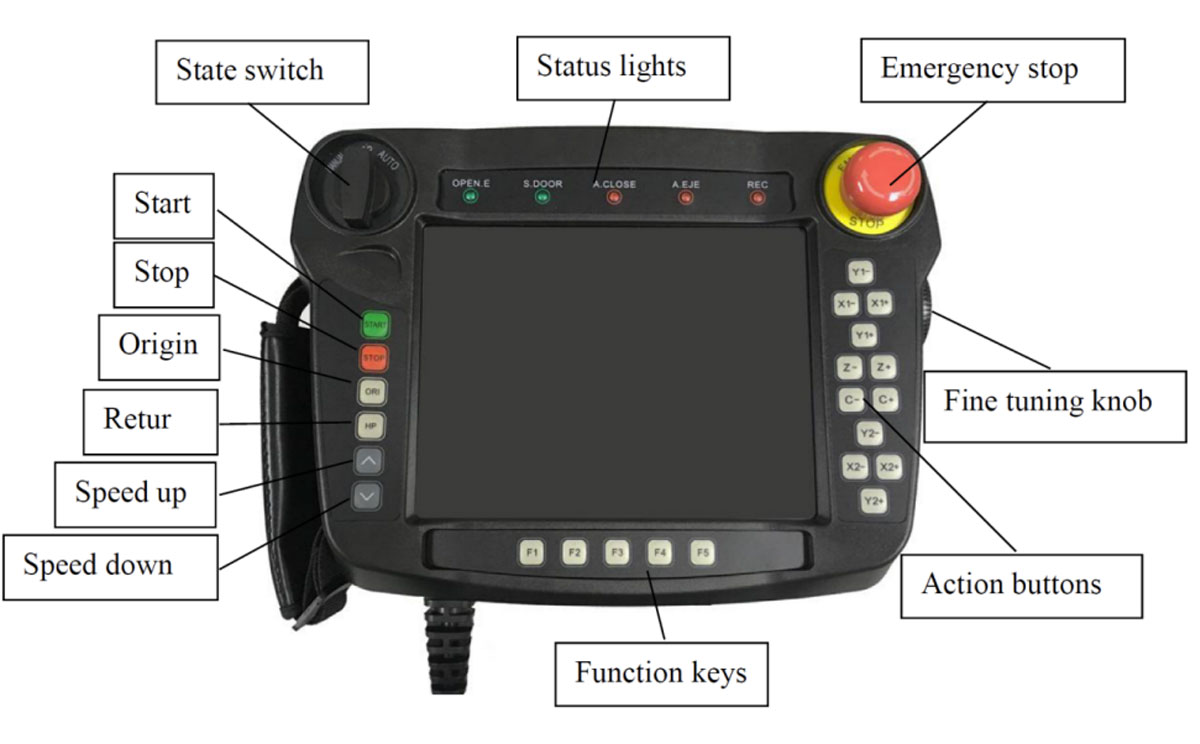
Stop the robot and other machines immediately in emergency.
Have a minor movement of the strokes for precise distance adjustment.
Move the axis manually

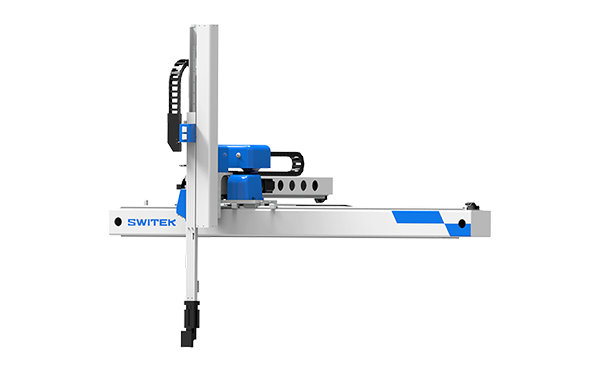
SW255C
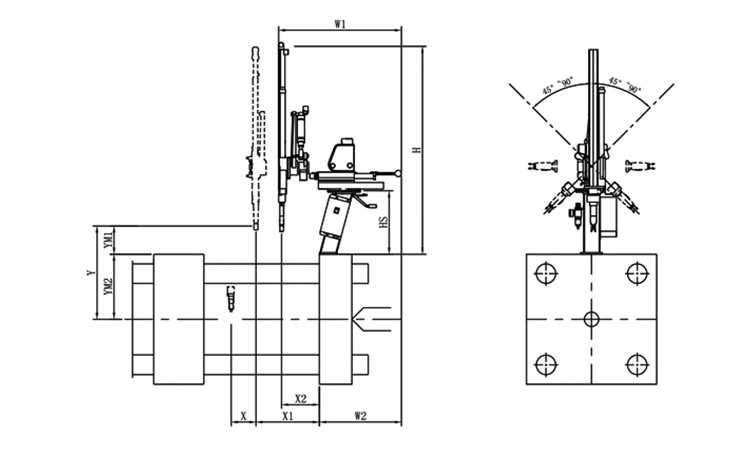
Unit: mm
| X1 | X2 | X3 | X4 | Y | YM1 | YM2 | Z | L | W | H | Payload | 300 | 100 | 0 | 0 | 550 | 155 | 395 | -45°~+45° | 650 | 650 | 1260 | 2kg |
|---|
EOAT Assembly Demonstration -- One Cavity In Mold Insertion EOAT With Mold Positioner
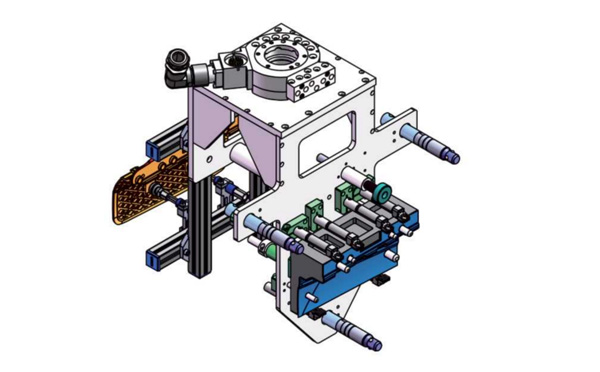
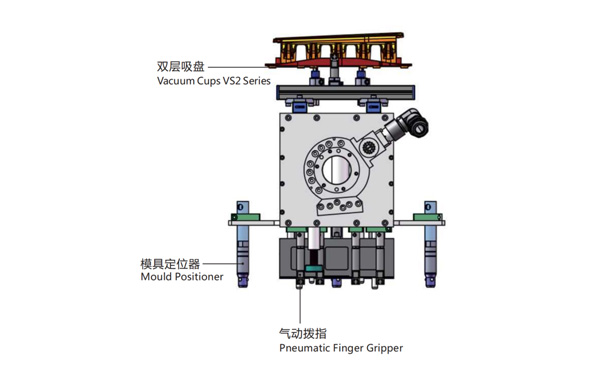
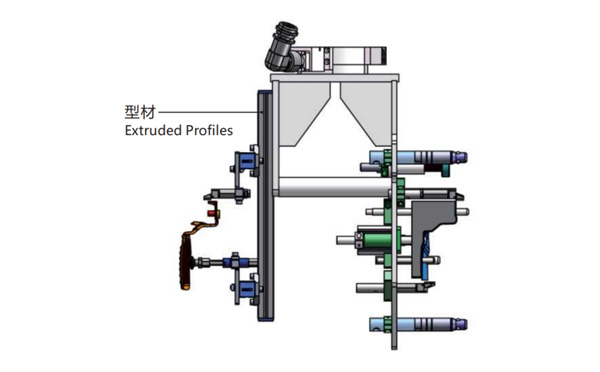
Product Descriptions
Bom List
| Product Name | PN # | Model | Quantity |
|---|---|---|---|
| Extruded Profiles | 4.Y00481 | PEP2525-1500 | 1 |
| Plugs for Profile | 4.Y00070 | PEP2525 | 8 |
| Mould Positioner | 8.Y00088 | GMP20A | 3 |
| Vacuum Cups VS2 Series | 1.Y05310 | VS2-SA20 | 2 |
| Rotative Suspensions | 8.Y00061 | VFR1421-G18 | 2 |
| Pneumatic Finger Gripper | 8.Y00084 | GFR14-95G | 7 |
| Extension Tube | 7.Y00733 | SMBY14-50 | 6 |
| Mounting Bracket | 7.Y00200-T | SMBE1-1440T | 3 |
| Cross Mounting Bracket for Profiles | 7.Y00194-T | SMBA-2525T | 4 |
| Vacuum Cup Fittings | 7.Y00703 | VM02-G18 | 2 |
For a Container with a Height of 100mm, What Would be the Minimal Opening Stroke of the Injection Molding Machine?
As we know, for the IML production of a container, the robot will do the actions of parts picking and label inserting in the mold, which means that the system will request a much larger in mold space compared to non-IML production. While selecting an injection molding machine for your IML project, the opening stroke of the injection molding machine would be a very important parameter to be taken into consideration. The basic formular for the opening stoke caculation would be heigh of the parts x 3 + 150mm, the potential injection molding machine must have a larger opening stroke, or the robot may not able to pick the parts and insert the labels symtaneously.